For the Best Mac Webcam, Use Your iPhone

The near-ubiquity of videoconferencing is a lasting effect of the pandemic. The ease of gathering a group virtually usually more than makes up for the downsides. Despite that, many people still appear in video calls with low-resolution, poorly lit video that makes the call less effective.

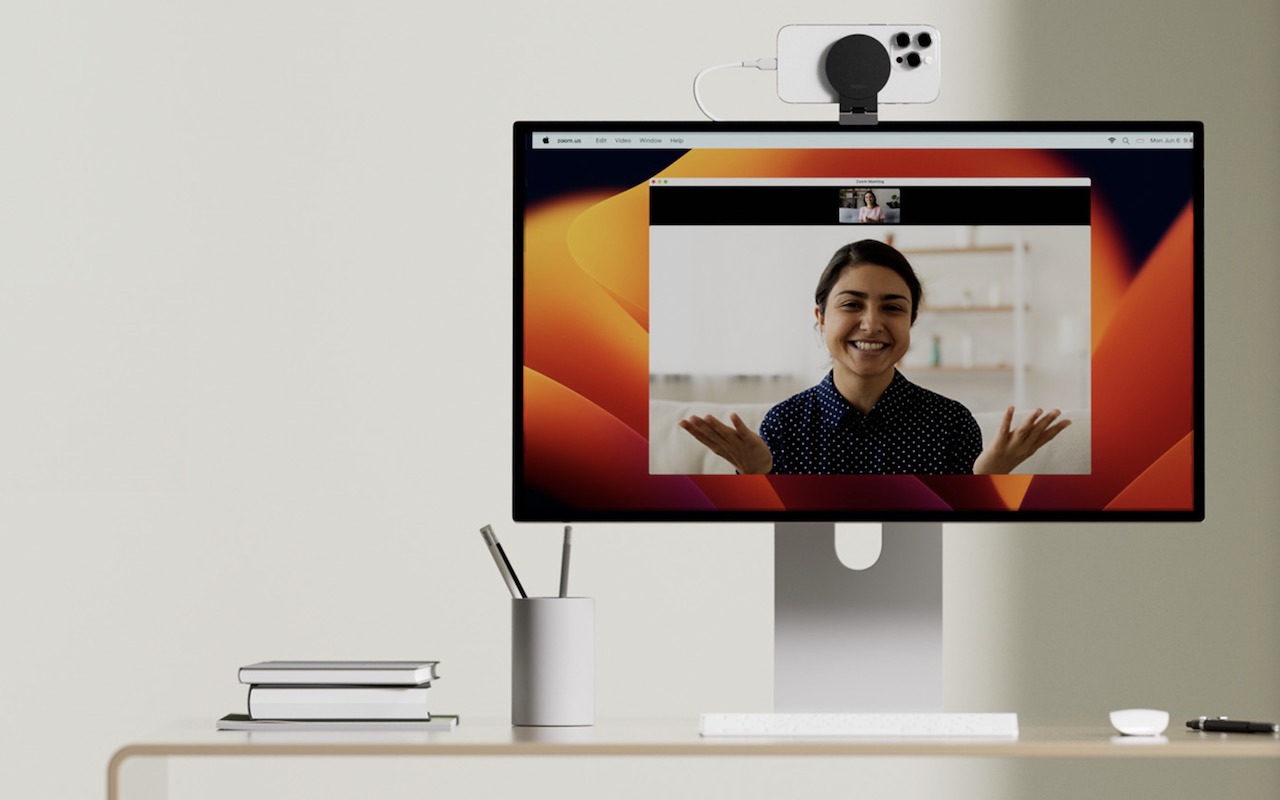
A better webcam is an easy way to improve your video, and the best readily available webcam may already be in your pocket. That’s because you can use your iPhone and its high-quality cameras as a wired or wireless Mac webcam, thanks to Apple’s Continuity Camera technology.

Your Apple gear likely meets the Continuity Camera system requirements. You need an iPhone XR or later (all iPhones introduced in 2018 or later) running at least iOS 16 and a Mac running macOS 13 Ventura or later. Both must be signed in to the same Apple ID.

You’ll want a mount that holds your iPhone in landscape orientation (horizontally) at the top of your Mac’s screen, with its rear cameras facing you. The first such mounts for laptops and desktops came from Belkin, but numerous manufacturers now sell inexpensive alternatives that have different industrial designs and support iPhones that can’t use MagSafe. Continuity Camera can drain your battery, so it’s worth plugging in a charger cable or getting a screen mount that also holds a MagSafe charger; look on Etsy for options, such as this one.
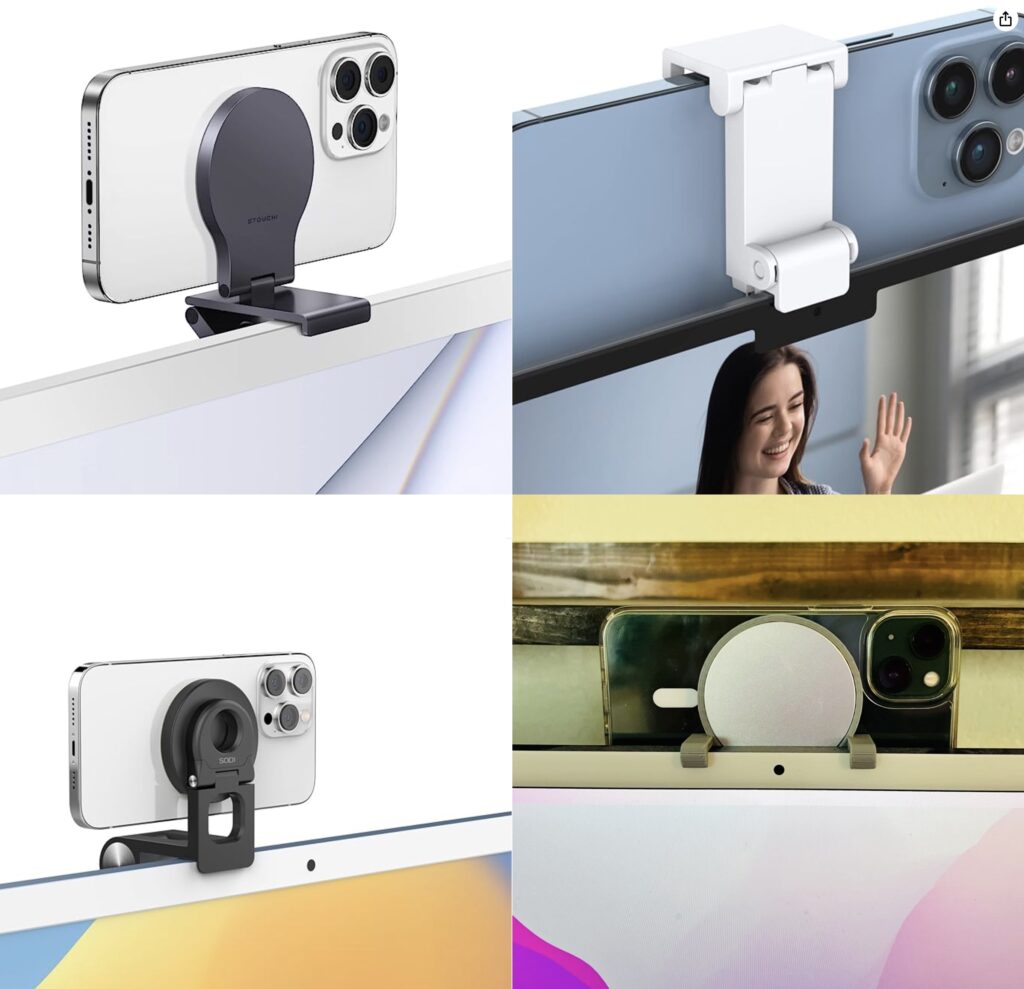
Although the samples above show the iPhone’s cameras in the upper-right corner, you can rotate the iPhone to position the cameras in the lower-left corner, which may put them more in line with your eyes and improve eye contact.

(Technically, you can put the iPhone anywhere—a tripod behind your screen would also work—and it doesn’t have to be in landscape orientation. However, apps detect the iPhone as a webcam automatically only when it’s in landscape orientation, and if it’s below or to the side of your screen, the video angle will likely be problematic. You can also take your iPhone off its mount and walk around with it as long as you stay in Bluetooth range of your Mac.)

When the iPhone is locked and in position, its camera and microphone become available to videoconferencing apps like FaceTime, Zoom, and Webex. Your app may start using the iPhone as a camera automatically, but if not, look for a menu or icon that lets you choose the desired camera. Similarly, you can use the iPhone’s mic as your audio input for the call, although the Mac’s built-in mic, AirPods, or other mic may offer equally good or better audio quality.

For the most part, the iPhone acts like a standard webcam. After you end the call, remove it from the mount to use it normally again. Should you need to check something on your iPhone during the call, you can remove it from the mount and either tap the Pause button or just unlock it—your video (and audio, if you’re using the iPhone as a mic too) will pause. To resume, lock and remount your iPhone. You may want to warn the other people on your call first in case something goes wrong and you get disconnected.

Receiving a phone call is a similar situation. Answering the call on the iPhone pauses the audio and video for the videoconference until you end the call, lock the iPhone, and mount it again. You may also be able to answer the call on the Mac, but that also pauses the audio and video, and you may need to choose the iPhone as your camera again afterward.

Ultimately, using your iPhone as a webcam is remarkably easy—Continuity Camera just works in our experience. The only tricky part is finding the screen mount and charger that work best with your Mac and usage patterns.

(Featured image by Belkin)


Social Media: Many of us spend significant chunks of the workday on video calls, and the best way to improve your onscreen look is with a better webcam, which you can probably find in your pocket. Learn how to use your iPhone as your Mac’s webcam here.

Similar Posts

  • A Swinging Hot Spot in Paradise

    You are visiting Key West, accompanied by your trusty iPhone and MacBook Air. Suddenly there’s an emergency at work, and you need to get online with your Mac. You can pick up a cell signal with the iPhone, but there’s no Wi-Fi that isn’t locked up. Well, my first thought might be “oh well, I’m on vacation!” but you are dedicated and need to be online.

    Don’t worry! You can use your iPhone’s cellular data plan to create a personal Wi-Fi hotspot that lets your Mac access the Internet through your iPhone. Also called “tethering,” it’s fast, easy, and can be a life-saver when you just have to get online with a Mac or your Wi-Fi-only iPad. It supports up to 5 users, too, which means you can get your team online, too!

    Before we explain how to do set up a personal hotspot, note that most but not all cellular carriers allow tethering on existing plans. For some, you might have to pay more for tethering. Keep in mind that any data consumed by your Mac while tethered will count against your data allowance and may generate overage fees. Carriers with “unlimited” data, like T-Mobile and Sprint, generally throttle your bandwidth to slower speeds if you use too much data.

    Along those lines, if you use a file sharing service like Dropbox or Google Drive, or an Internet backup service like CrashPlan or Backblaze, turn them off before connecting. Particularly if they haven’t connected in a while, those services can transfer a lot of data quickly, which could result in a hefty overage charge or awkward data throttling for the rest of the month.

    With those warnings out of the way, follow these steps in iOS 9 to turn on Personal Hotspot:

    1. On your iPhone, if you’ve never enabled the feature before, go to Settings > Cellular > Personal Hotspot. Once you’ve turned Personal Hotspot on once, it moves up a level, so you can access it from Settings > Personal Hotspot.
    1. Tap on Wi-Fi Password and enter a password that’s at least 8 characters long and easy to type. It doesn’t need to be super secure because you can keep Personal Hotspot turned off unless you’re using it. But you do want a password so random people nearby can’t connect and use your data.
    1. Once you’ve entered a password, slide the Personal Hotspot switch.

    That’s it! The Personal Hotspot screen provides basic instructions for connecting to the iPhone via Wi-Fi, Bluetooth, and USB. Stick with Wi-Fi, since it’s the easiest and most reliable in most cases.

    • To connect to your new Personal Hot Spot on your Mac, click the Wi-Fi icon in the menu bar and choose your iPhone’s name.
    • On your iPad, go to Settings > Wi-Fi and choose your iPhone.
    • Enter your password when prompted, making sure to select Remember This Network. That way, you won’t even have to enter your password the next time.
    • The Mac or iPad then connects to your iPhone, showing a hotspot icon instead of the usual wave icon for the Wi-Fi menu.

    Could it get any simpler? When you’re done, the safest thing to do, to ensure you don’t accidentally end up using too much of your data allowance, is to turn off the Personal Hotspot switch in Settings > Personal Hotspot. Your Mac or iPad will automatically disconnect.

    Actually, it CAN be simpler! Your Mac can automatically use the personal hotspot on your iPhone to connect to the Internet when they’re within range of each other.

    Use Instant Hotspot on your iPhone (with iOS 8 or later) to provide internet access to your Mac computers and other iOS devices (with OS X Yosemite or iOS 8) that are in range and signed into iCloud using the same Apple ID. Instant Hotspot uses your iPhone — you don’t have to enter a password or even turn on Personal Hotspot.

    Make sure your iOS device and your Mac are signed into iCloud with the same Apple ID.

    On your Mac, click the Wi-Fi status icon in the menu bar, then choose your iPhone or iPad.

    After you connect to the iPhone or iPad Personal Hotspot, you can check the cellular signal strength and the battery status of the iPhone or iPad in the Wi-Fi status menu.

    When you’re not using using the hotspot, your devices automatically disconnect to save battery life.

    One more big advantage of Personal Hot Spots. When you are shopping for that new iPad, perhaps you don’t need the cellular model if you nearly always have your iPhone handy. That’s what I do. If I need internet access on my Wi-Fi iPad, I simply connect to my Hot Spot! Saves me the added cost of a cellular-enabled iPad and the monthly fees from the cell carrier!