
New M3 Chip Family Powers Updated MacBook Pros and 24-inch iMac
At Apple’s Halloween-themed Scary Fast event on October 30, the company unveiled its next-generation Apple silicon chips for Macs, the M3, M3 Pro, and M3 Max. Apple also showcased new 14-inch and 16-inch MacBook Pro models and a faster version of the 24-inch iMac based on these chips. They’re available to order now, with units in stores and orders starting to arrive on November 7, apart from the M3 Max models that will arrive in late November. Apple also dropped the awkwardly positioned 13-inch MacBook Pro model from the lineup, leaving the low end to the highly capable MacBook Air.
Apart from the new chips, the updated MacBook Pro models boast only a brighter screen, a slightly longer battery life in the M3 14-inch model, and a new Space Black aluminum finish for the M3 Pro and M3 Max models. There are no other changes for the M3 24-inch iMac.
M3, M3 Pro, and M3 Max Bring More Power to the 14-inch and 16-inch MacBook Pro
Although the MacBook Air has done an admirable job of supporting everyday laptop users, professionals who rely on processor-intensive apps have long turned to the 14-inch and 16-inch MacBook Pro for more power. Apple updated the MacBook Pro to the M2 Pro and M2 Max in January 2023, a release that probably came later than Apple wanted. There’s less reason to upgrade from an M2 model to a new M3 one, but the performance gains are significant when upgrading from Intel-based and M1 models.
The M3 MacBook Pro models beat the equivalent Intel-based MacBook Pro models by 3x, 5.5x, 7.4x, and even 20x, depending on the specific app and task. Overall, Apple claims speed improvements up to 11x over the fastest Intel-based MacBook Pro. Gains over equivalent M1-based MacBook Pros are also significant, with improvements from 30% to 60%.

Apple expanded the options for the 14-inch MacBook Pro, so there are now three basic configurations:
- M3 starting at $1599: It has an 8-core CPU, 10-core GPU, 8 GB of memory, and 512 GB of storage. You can (and probably should) jump to 16 GB of memory; 24 GB is also available. This model has only two Thunderbolt/USB 4 ports and can drive only a single external display.
- M3 Pro starting at $1999: You have two options here: either 11 or 12 CPU cores and 14 or 18 GPU cores, and either 18 GB or 36 GB of memory. These models feature three Thunderbolt/USB 4 ports and support one or two external displays.
- M3 Max starting at $3199: The maxed-out configuration also sports two options: either 14 or 16 CPU cores and 30 or 40 GPU cores, plus 36 GB of memory, upgradeable only to 96 GB. These models also have three Thunderbolt/USB 4 ports but can drive up to four external displays.
The 16-inch MacBook Pro has only M3 Pro and M3 Max configurations:
- M3 Pro starting at $2899: There’s only one option here, matching the beefier 14-inch M3 Pro model: a 12-core CPU, 18-core GPU configuration with 36 GB of memory.
- M3 Max starting at $3499: The choices here are either 14 or 16 CPU cores and 30 or 40 GPU cores. The lower-end configuration comes with 36 GB of memory and can upgrade to 96; the higher-end configuration has 48 GB of memory and has options for 64 GB or 128 GB.
Storage starts at 512 GB for the M3 14-inch model and 1 TB for the rest, with options for 2 TB, 4 TB, and 8 TB.
Note that the M3 14-inch MacBook Pro replaces the awkwardly positioned M2 13-inch MacBook Pro, which offered only the slightest advantage over its cheaper M2 13-inch MacBook Air cousin. The new M3 14-inch MacBook Pro does cost $100 more than the comparable 13-inch MacBook Pro that it replaces, but that’s a fair trade for the bigger, better screen and 1080p FaceTime HD camera. Now there’s once again a clear physical and performance distinction between the MacBook Air and the MacBook Pro lineups.
Otherwise, some prices have increased, but in most cases, that may be because the new configurations include more unified memory. For instance, the M3 Pro 16-inch MacBook Pro previously started at $2499 with 16 GB of memory, but now starts at $2899 with 36 GB of memory. Regardless, the professionals buying these speedy Macs can often justify paying more if the performance boost directly increases productivity.
M3 Chip Improves 24-inch iMac Performance
There isn’t much to say about the refreshed 24-inch iMac, which trades its M1 chip for an M3 but sports no other notable changes and keeps its $1299 starting price. The 24-inch iMac remains an attractive option for anyone looking for an all-in-one desktop Mac.
The switch to the M3 does provide more memory choices. Previously, you could choose only 8 GB or 16 GB of memory. With the M3, 8 GB of memory remains standard, but you can upgrade to either 16 GB (a good idea) or 24 GB (probably unnecessary for most people). Storage still starts at 256 GB, which isn’t much these days, particularly if you take a lot of photos or videos, and you can upgrade to 512 GB, 1 TB, or 2 TB.
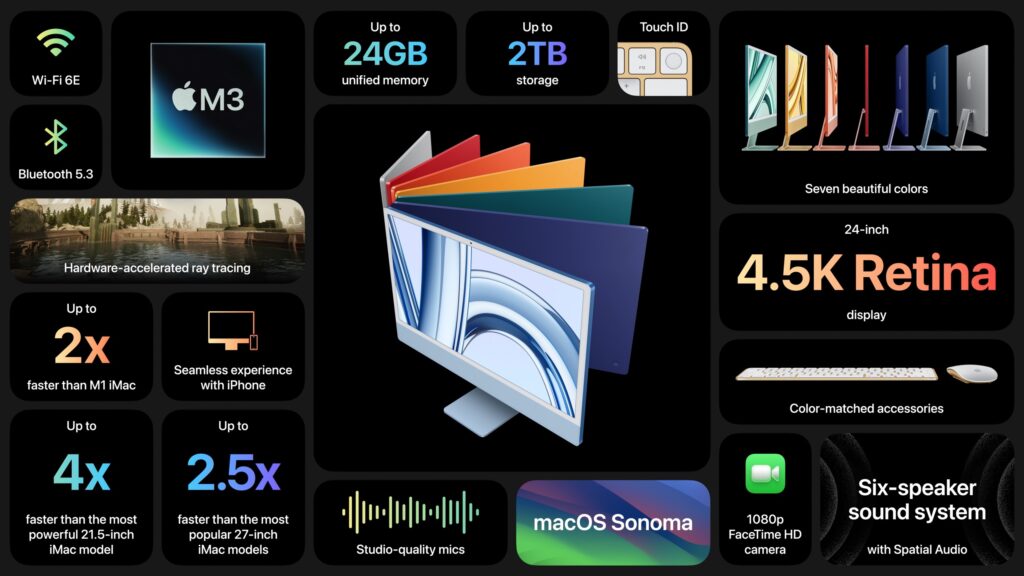
Apple gave no hints that it is considering a replacement for the popular 27-inch iMac that Apple discontinued when it introduced the Mac Studio and 27-inch Studio Display. Though the 24-inch iMac has an impressive 4.5K Retina display, it’s still smaller than the 5K Retina display in the 27-inch iMac. Speculation has swirled around the possibility of a 32-inch iMac Pro, but given that a Mac Studio starts at $1999 and the 32-inch Pro Display XDR sells for $4999, it’s hard to imagine such an iMac Pro having a competitive price.
Also missing from the announcement was any mention of USB-C versions of the Magic Keyboard, Magic Trackpad, and Magic Mouse. Those accessories continue to use the Lightning connector and ship with a USB-C to Lightning cable for charging.
(Featured image by Apple)
Social Media: Apple has unveiled the M3, M3 Pro, and M3 Max chips alongside new 14-inch and 16-inch models of the MacBook Pro that use the new chips. The company also refreshed the 24-inch iMac, replacing its M1 with an M3.