Apple Announces New MacBook Air Lineup with M3 Chip
In November 2023, Apple unveiled the M3 chip in new versions of the 24-inch iMac and MacBook Pro, causing speculation about when other Mac models would be updated to match. If you’ve been longing for a MacBook Air with an M3 chip, your wait is over. (And we expect Apple to update the Mac mini soon.)
Apple has now announced M3 versions of the 13-inch and 15-inch MacBook Air. For most Mac laptop users who don’t need the additional speed of the M3 Pro or M3 Max chips in the MacBook Pro lineup, these new MacBook Air models combine excellent performance with low prices. The 13-inch MacBook Air starts at $1,099, and the 15-inch model starts at $1,299.
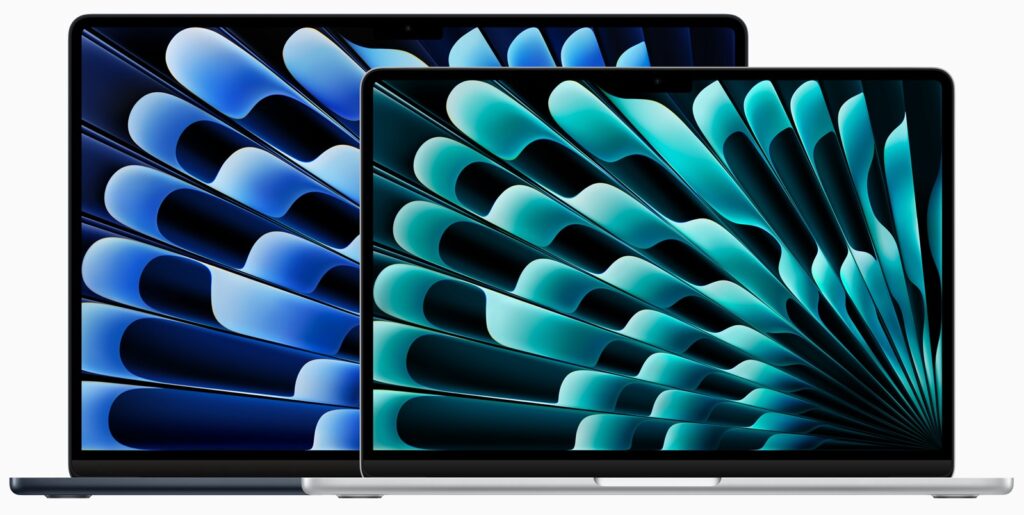
Nothing has changed regarding size, weight, and industrial design, and nearly all the specs remain identical to the previous M2 MacBook Air models. There are three notable differences:
- The M3 chip: Although the earlier M1 and M2 chips are no slouches, the M3 chip provides even better performance. Benchmarks suggest a 25% to 35% improvement over the M1, and Apple cites real-world examples where the M3 is 35% to 60% faster than the M1. Compared to the M2, the M3 is probably 10% to 20% faster.
- Support for two external displays: Previously, the MacBook Air could drive only one external display. These new models, however, can drive one external display at up to 6K resolution and another at up to 5K resolution, as long as the lid is closed. (Apple says a software update will enable the same capability for the 14-inch M3 MacBook Pro.)

- Wi-Fi 6E and Bluetooth 5.3 wireless connectivity: These upgrades aren’t exciting, but they bring the MacBook Air up to par with other recent Apple devices and industry standards. Both provide faster, more robust wireless connectivity, but only when used with other compatible gear.
Should you buy one of these new MacBook Air models? It all depends on what you use now:
- Intel-based Mac laptop: In terms of performance, the M3 MacBook Air will blow the doors off any Intel-based Mac laptop, and we strongly encourage you to upgrade. The main area where the MacBook Air might disappoint is in the number of ports. It charges via MagSafe 3 and has two Thunderbolt/USB 4 ports, which are sufficient for an external display and a Time Machine backup drive, for instance. If you need more ports, a Thunderbolt hub is probably in your future.
- M1 or M2 MacBook Air or MacBook Pro: Although the M3 chip is faster than the base-level M1 and M2, our experience is that most people with those Macs aren’t suffering from performance problems. So no, don’t upgrade. If you need more performance, a MacBook Pro with an M3 Pro or M3 Max chip makes more sense.
- No laptop: For most students getting their first computer or someone who’s adding a laptop to complement a desktop Mac, the M3 MacBook Air models are extremely attractive. We recommend the higher-end MacBook Pro models only for those who anticipate doing processor-intensive audio, video, photo, or development work.
Finally, if you’re pinching pennies, you can still buy the 13-inch M2 MacBook Air starting at $999, and even if you customize it with more memory or storage, you’ll save $100.
You have four decisions to make once you’ve decided to buy a new M3 MacBook Air. We’re happy to consult on your specific situation, but here’s our general advice:
- Memory: The base amount of memory on the M3 chip is 8 GB (it’s on the chip and can’t be upgraded later), but you can get versions that come with 16 GB or 24 GB. 8 GB is acceptable for casual use, but 16 GB is safer if you want to run a bunch of apps or may have more involved needs in the future. Get 24 GB only if you use memory-intensive apps.
- Storage: The base level of storage is 256 GB, which isn’t much. We know many people with photo libraries larger than that. You can upgrade to 512 GB, 1 TB, or 2 TB. Note that if you have a lot of old, seldom-needed files, it may be better to order only 512 GB of storage, for instance, and buy an inexpensive external SSD for your archives.
- Processor: The M3 comes in two versions. Both have 8 CPU cores, but one has only 8 GPU cores, whereas the other has 10 GPU cores. The 8/8 version is available only in the 13-inch MacBook Air and only if you don’t expand memory beyond 8 GB or storage beyond 256 GB. Get the low-end version only if you’re sure you don’t need more memory or storage.
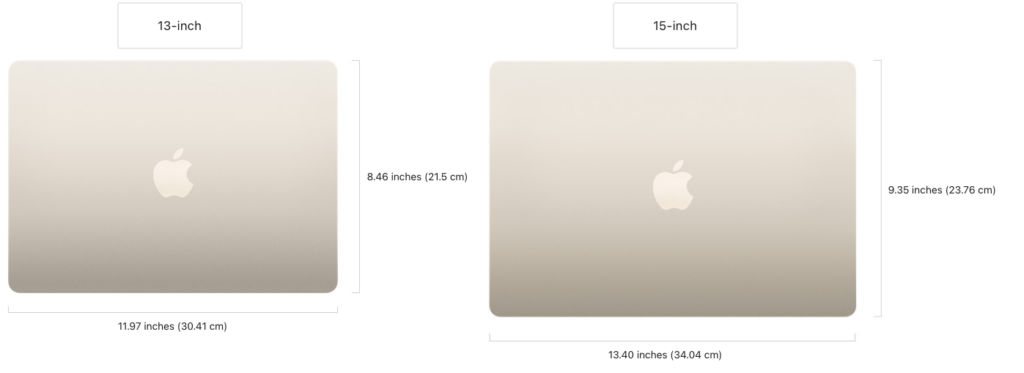
- Screen size: You must choose a 13.6-inch or 15.3-inch Liquid Retina screen. The 15-inch screen is undeniably larger and displays more content, but the overall Mac is about an inch (2.25–3.5 cm) larger in both dimensions, and it weighs 3.3 pounds (1.51 kg) compared to 2.7 pounds (1.24 kg) for the 13-inch model. This decision is purely personal preference, and we recommend checking out each one in person before buying.
For most Mac laptop users, the M3 MacBook Air models are compelling and well worth a look.
(Featured image by Apple)
Social Media: Apple has announced 13-inch and 15-inch MacBook Air models based on the M3 chip. Along with faster performance, they can drive two external displays when the MacBook Air’s lid is closed. Read our buying advice here: