New M4 MacBook Air Features Faster Performance and Improved Video Calls

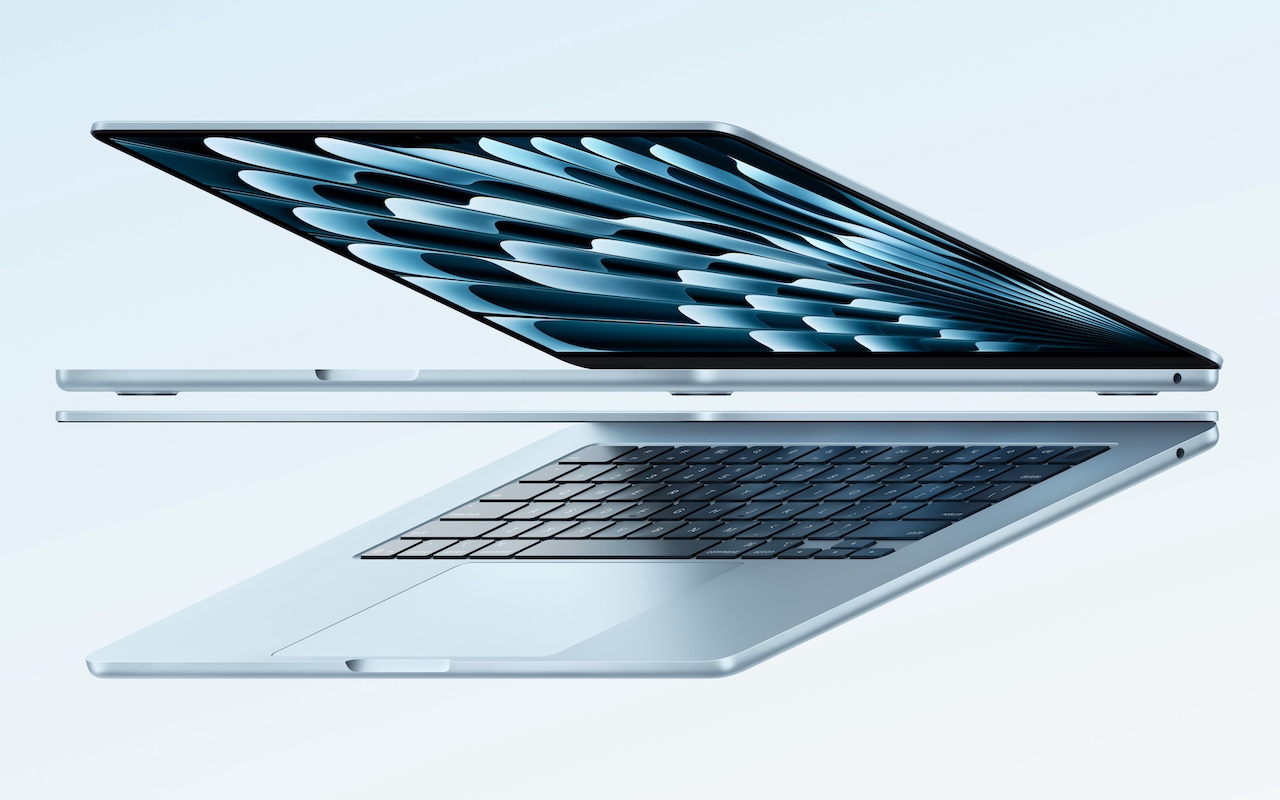
Apple has unveiled an update to the MacBook Air, which it touts as the world’s most popular laptop. While the MacBook Air has long been a compelling option for many consumers, the new 13-inch and 15-inch M4 MacBook Air models improve performance, boast a new 12-megapixel Center Stage camera, and fully support two external displays, making them even more appealing.

Adding to that appeal is a $100 price drop that brings the starting price back to $999 after Apple raised it several years ago. In concert with the return to the lower starting price, the company dropped the M2 MacBook Air and M3 MacBook Air from the official price list, though refurbished units remain available temporarily for discounted prices.

The jump from the M3 to the M4 increases performance, though Apple doesn’t say by how much. Independent benchmarks suggest that it may be about 20% faster. What’s more important for those considering an upgrade is that the M4 MacBook Air is up to twice as fast as the M1 MacBook Air and a whopping 23 times faster than the fastest Intel-based MacBook Air.

The base level of the M4 MacBook Air now comes with 16 GB of unified memory, up from 8 GB. This increase is partly aimed at enhancing Apple Intelligence performance. It also reduces the necessity for many users to consider upgrading, which we had previously recommended. For most people, 16 GB is sufficient, but for optimal multitasking performance and to future-proof your investment, consider upgrading to 24 GB. Only those with demanding workflows will need the new maximum of 32 GB, and in such cases, it may be worthwhile to consider a 14-inch MacBook Pro.

Apple also significantly improved video calls by swapping the MacBook Air’s previous 1080p FaceTime HD camera for the 12-megapixel Center Stage camera. As you move around during a call, Center Stage zooms and pans to keep you in the frame. Not having to stay stationary during calls can make a day with too many virtual meetings less exhausting. The camera also supports Desk View, which lets you show off items below the camera, essentially on top of the keyboard. It’s a niche feature, but one that some people find useful.

The final improvement in the M4 MacBook Air is subtle but may be compelling for some users. The M1 MacBook Air and M2 MacBook Air could drive a single external display in addition to the built-in screen, and the M3 MacBook Air supported two external displays at once, but only if you closed the lid and used an external keyboard and trackpad. With the M4 MacBook Air, you can now connect two external displays while keeping the lid open, which gives you three screens and lets you use the built-in keyboard and trackpad. Increasing screen space boosts productivity by allowing you to see more on-screen at once, so we recommend you give multiple displays a try.

The new M4 MacBook Air comes in four colors: silver, starlight, midnight, and a new sky blue that replaces the previous space gray. The 13-inch model starts at $999, and the 15-inch model at $1,199. Memory upgrades include 24 GB for $200 or 32 GB for $400, and storage options beyond the base 256 GB carry the usual price premiums: 512 GB for $200, 1 TB for $400, and 2 TB for $800.

Put simply, the M4 MacBook Air is impressive. It boasts serious power in a svelte, lightweight package that makes very few compromises. It’s equally at home on the road as a laptop or at a desk connected to external displays, making it the perfect Mac for nearly any student and many average Mac users. Only those who require significant processing power or prefer a desktop Mac need to look at the Mac mini or MacBook Pro.

(Featured image by Apple)


Social Media: Apple has updated the MacBook Air with an M4 chip and higher memory ceiling for added performance, a 12-megapixel Center Stage camera for better video calls, and enhanced multi-display support for greater productivity. And it’s $100 less.

Similar Posts

  • _Hello Friends_,

    It is hard to believe that it is February already. There is almost no snow up in Vermont and Artie is reporting that farmers are already gathering sap from the maple trees to make syrup. The Iowa caucuses have come and gone and on Tuesday the first in the nation primary is next door in New Hampshire. Being a leap year my granddaughter, Gracie, will have her 4th real birthday on the 29th. She was recently chosen as guest composer on Vermont Public Radio. You can hear her interview and one of her “**compositions**”:http://digital.vpr.net/post/student-composer-showcase-gracie-bangoura#stream/0 online. 

    February is also Black History month and each week in Kibbles and on our “**blog**”:http://blog.smalldog.com we will be honoring Black History. It is fun researching and writing these little bios of Black American heroes and heroines.  

    Florida’s governor declared a state of emergency in four counties regarding the horrible tragedy unfolding in Brazil with the Zika virus. One thing that is not being widely reported is the apparent link to genetically modified mosquitos and the microcephaly disaster. Apparently, Brazil was the site of a massive experiment with genetically modified mosquitos that were released into the wild. They were proposing a similar release for here in the Florida Keys but it has not happened. The Zika virus has been around since 1947 and this is the first big outbreak of microcephaly. You can “**read more about it,**”:http://www.theecologist.org/News/news_analysis/2987024/pandoras_box_how_gm_mosquitos_could_have_caused_brazils_microcephaly_diasaster.html regardless of whether that analysis is true, I think releasing genetic mosquitos is a bad idea.

    I am happy to announce that Small Dog Electronics will be offering GoPro cameras and accessories in our stores this month. We have had lots of requests for these action cameras from our customers and we finally have secured the line for our stores. We will talk more about GoPro as we get them into stock.  

    This week’s Kibbles & Bytes special is a “**Hammerhead charging bundle**”:http://www.smalldog.com/wag900002149/special-save-20-on-hammerhead-charging-bundle As you know we manufacture rugged braided lightning cables that are certified by Apple with their MFI “Made for iPhone” designation. This means that our manufacturer has passed all the tests with Apple and use genuine Apple lightning connectors. You do not have to worry about compatibility with MFI designation. This bundle includes two of these braided cables, our Hammerhead 2-port home charger and Hammerhead 2-port car charger. Each of these chargers have the capacity to charge an iPhone and an iPad simultaneously. Sold separately, this bundle would be $72.96 but exclusively for Kibbles & Bytes readers this week you can have this handy bundle for only “**$49.99!**”:http://www.smalldog.com/wag900002149/special-save-20-on-hammerhead-charging-bundle 

  • A Swinging Hot Spot in Paradise

    You are visiting Key West, accompanied by your trusty iPhone and MacBook Air. Suddenly there’s an emergency at work, and you need to get online with your Mac. You can pick up a cell signal with the iPhone, but there’s no Wi-Fi that isn’t locked up. Well, my first thought might be “oh well, I’m on vacation!” but you are dedicated and need to be online.

    Don’t worry! You can use your iPhone’s cellular data plan to create a personal Wi-Fi hotspot that lets your Mac access the Internet through your iPhone. Also called “tethering,” it’s fast, easy, and can be a life-saver when you just have to get online with a Mac or your Wi-Fi-only iPad. It supports up to 5 users, too, which means you can get your team online, too!

    Before we explain how to do set up a personal hotspot, note that most but not all cellular carriers allow tethering on existing plans. For some, you might have to pay more for tethering. Keep in mind that any data consumed by your Mac while tethered will count against your data allowance and may generate overage fees. Carriers with “unlimited” data, like T-Mobile and Sprint, generally throttle your bandwidth to slower speeds if you use too much data.

    Along those lines, if you use a file sharing service like Dropbox or Google Drive, or an Internet backup service like CrashPlan or Backblaze, turn them off before connecting. Particularly if they haven’t connected in a while, those services can transfer a lot of data quickly, which could result in a hefty overage charge or awkward data throttling for the rest of the month.

    With those warnings out of the way, follow these steps in iOS 9 to turn on Personal Hotspot:

    1. On your iPhone, if you’ve never enabled the feature before, go to Settings > Cellular > Personal Hotspot. Once you’ve turned Personal Hotspot on once, it moves up a level, so you can access it from Settings > Personal Hotspot.
    1. Tap on Wi-Fi Password and enter a password that’s at least 8 characters long and easy to type. It doesn’t need to be super secure because you can keep Personal Hotspot turned off unless you’re using it. But you do want a password so random people nearby can’t connect and use your data.
    1. Once you’ve entered a password, slide the Personal Hotspot switch.

    That’s it! The Personal Hotspot screen provides basic instructions for connecting to the iPhone via Wi-Fi, Bluetooth, and USB. Stick with Wi-Fi, since it’s the easiest and most reliable in most cases.

    • To connect to your new Personal Hot Spot on your Mac, click the Wi-Fi icon in the menu bar and choose your iPhone’s name.
    • On your iPad, go to Settings > Wi-Fi and choose your iPhone.
    • Enter your password when prompted, making sure to select Remember This Network. That way, you won’t even have to enter your password the next time.
    • The Mac or iPad then connects to your iPhone, showing a hotspot icon instead of the usual wave icon for the Wi-Fi menu.

    Could it get any simpler? When you’re done, the safest thing to do, to ensure you don’t accidentally end up using too much of your data allowance, is to turn off the Personal Hotspot switch in Settings > Personal Hotspot. Your Mac or iPad will automatically disconnect.

    Actually, it CAN be simpler! Your Mac can automatically use the personal hotspot on your iPhone to connect to the Internet when they’re within range of each other.

    Use Instant Hotspot on your iPhone (with iOS 8 or later) to provide internet access to your Mac computers and other iOS devices (with OS X Yosemite or iOS 8) that are in range and signed into iCloud using the same Apple ID. Instant Hotspot uses your iPhone — you don’t have to enter a password or even turn on Personal Hotspot.

    Make sure your iOS device and your Mac are signed into iCloud with the same Apple ID.

    On your Mac, click the Wi-Fi status icon in the menu bar, then choose your iPhone or iPad.

    After you connect to the iPhone or iPad Personal Hotspot, you can check the cellular signal strength and the battery status of the iPhone or iPad in the Wi-Fi status menu.

    When you’re not using using the hotspot, your devices automatically disconnect to save battery life.

    One more big advantage of Personal Hot Spots. When you are shopping for that new iPad, perhaps you don’t need the cellular model if you nearly always have your iPhone handy. That’s what I do. If I need internet access on my Wi-Fi iPad, I simply connect to my Hot Spot! Saves me the added cost of a cellular-enabled iPad and the monthly fees from the cell carrier!

  • Do you use iCloud for Safari?

    With all the news surrounding the government’s attempt to force Apple to write software that doesn’t exist to crack an iPhone, iCloud has been in the news, too! Do you use iCloud? Apple has some huge server farms to support this amazing technology and I thought it would be good to do a brief review of some of the features as they relate to Safari.

    iCloud has sort of settled to the back of my mind because it just does its thing in the background and serves up features that I take for granted. But this week, I ran into a dilemma that puzzled me for some time. I noticed that I had accidentally deleted one of my folders in my Safari favorites bar. These were important bookmarks and I needed them back. Well, like a good boy, I have a Time Machine backup and quickly went back in time and restored my Safari bookmarks from a time before I had deleted them. Good stuff, but when I went to look the next morning, the folder was gone again. This happened a few times with me going back in time to get the .plist file. Then I figured it out – I had Safari active in iCloud so my bookmarks were being synced in the cloud. So, every time I restored it, it would eventually be overwritten by iCloud. The solution? Really sort of simple, I turned off Safari in iCloud preferences and turned it back on, problem solved.

    Activating Safari in iCloud gives you some great tools. You can start browsing on your iPad and pick up seamlessly from your Mac or you iPhone. It syncs your bookmarks and tabs and if you also use iCloud Keychain it will remember all those passwords for the websites you visit. If you use the reading list function of Safari it will also keep those current across your devices.

    As with the other features of iCloud, the features only work if you are signed on with the same Apple ID on all of your devices. It won’t know that you are signed onto one AppleID with your Mac and another with your iPhone. Most common issues with iCloud come down to this simple issue. Apple has not made it easy to merge Apple IDs so at least for iCloud you should be consistently using the same Apple ID. Open the iCloud System Preference on your Mac and choose Safari to activate iCloud on your Mac or go to the iCloud Setting on your iPhone or iPad to activate.

    You can also access the Safari tabs that you have open on your Mac on your iPhone or iPad. It is a bit different looking on the iPhone or iPad. Open Safari on your iPhone or iPad and then tap the tabs icon. You will see all of your open Safari windows but if you scroll down at the bottom will be all the tabs open on your Mac and you can click on any of those to make it active.