Follow These Steps When Switching to a New iPhone 18
Are you considering getting one of Apple’s new iPhone 18 models? While it’s tempting to unbox a new iPhone and dive right in, a methodical setup will save you from potential frustrations down the road. When you’re ready to transfer your data—and, for many people, that means much of your digital life—to the new iPhone, follow these step-by-step instructions. For visual learners, Apple also provides a video showing how to transfer your data and set up a new iPhone.
- Ensure that both your current iPhone and Apple Watch (if you have one) are running the latest versions of iOS and watchOS. These updates can take a while to install, so don’t leave them for the last minute.
- Have your login details ready: you’ll need your iPhone and Apple Watch passcodes, along with your Apple Account email address and password.
- Back up your old iPhone to iCloud or your Mac. If you back up to a Mac, make sure you encrypt the backup (and record the encrypted backup password!) so it includes passwords, Wi-Fi settings, browsing history, Health data, and call history. For safety, consider backing up to both iCloud and your Mac. iCloud backups are typically more straightforward and avoid issues like unreliable USB cables. If you don’t usually back up to iCloud, Apple offers temporary iCloud storage for 21 days when transferring to a new iPhone, with another 21 days if your new iPhone doesn’t arrive in time. To make a temporary iCloud backup, go to Settings > General > Transfer or Reset iPhone and tap Get Started under Prepare for New iPhone. The temporary backup sticks around for 7 days after you restore it to the new iPhone.
- If you have an Apple Watch, you can transfer it to the new iPhone during setup. If the automatic transfer doesn’t work for some reason, you can manually unpair the Apple Watch from the old iPhone and pair it again with the new one. If you choose the manual route with a cellular Apple Watch, you’ll be prompted to keep or remove your cellular plan; be sure to keep the plan to continue using it after you re-pair.
- If you ordered your new iPhone through Apple and linked it to your cellular carrier account at purchase, or bought it directly from your carrier, your phone number usually transfers automatically during activation. If the transfer doesn’t happen automatically and your carrier supports eSIM Quick Transfer, Setup Assistant will guide you through transferring your eSIM directly from your old iPhone.
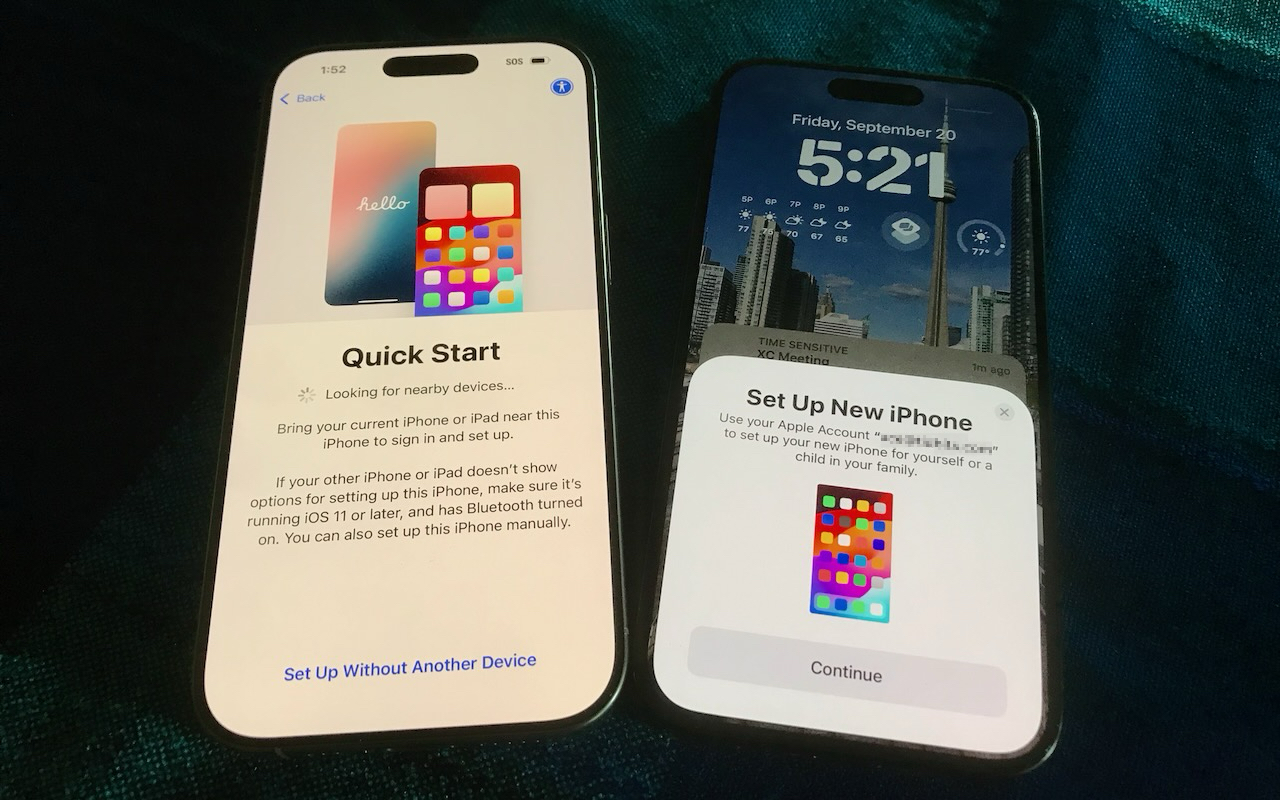
- Use Apple’s Quick Start to set up the new iPhone. Put your old iPhone nearby, follow the on-screen instructions, and use it to scan the animation that appears on the new iPhone. When Quick Start asks how you want to transfer your data, you have two main choices: iCloud or a direct transfer. Neither is especially quick, so start only when you have plenty of time. (If your old iPhone isn’t available or Quick Start fails, you can instead set up the new iPhone manually and restore from an iCloud or Mac backup.)
- Download from iCloud: Restore from your old iPhone’s iCloud backup. This approach lets you begin using the new iPhone while apps and data continue downloading in the background. After connecting the new iPhone to Wi-Fi and choosing Download from iCloud, select the correct backup—probably the most recent one you just created.
- Transfer from iPhone: Transfer your apps, data, and settings directly from the old iPhone, either wirelessly or with a wired connection—a wired connection can be useful if wireless migration proves unreliable, but there’s no way to know which will be faster. With a direct transfer, regardless of wired or wireless, both iPhones remain unavailable until the process finishes. For wireless transfers, keep them near each other and plugged into power.
- Finder or iTunes: Although Apple still supports restoring your old iPhone’s data from a backup saved to your Mac, it gets the least attention these days, and we would resort to it only if the Quick Start methods failed. When you get to the Transfer Apps & Data screen on the new iPhone, tap From Mac or PC, connect the new iPhone to your Mac, open a Finder window (or iTunes on macOS 10.14 Mojave or earlier), select the iPhone, click Restore Backup, and choose the appropriate backup.
- Complete post-transfer tasks. Some app data needs to sync, so open the Mail, Contacts, and Calendar apps to check for your information; it may take a few minutes to populate. Verify you can make and receive calls. You’ll need to add your payment cards to Apple Pay, and transfer or re-add any transit or ID cards that don’t appear in Wallet. If necessary, pair your Apple Watch with the new iPhone. Also, pair your Bluetooth accessories—you shouldn’t need to re-pair AirPods, which sync automatically via iCloud. Apps might ask you to log in again and grant notification permissions, and you might need to re-download content and in-app purchases.
- If you rely on Apple’s Passwords app for passwords, passkeys, and two-factor authentication codes, everything should sync via your iCloud account, assuming you have Passwords & Keychain enabled in iCloud. 1Password and other password managers also usually sync via an online account. Two-factor authentication apps like Authy and Google Authenticator may need additional configuration—confirm that your codes appear on the new iPhone. Regardless, verify that you can log in to key accounts before wiping the old phone.
- If your employer or school requires you to register your iPhone for access to organizational systems, verify that everything works before erasing your old phone. Authentication apps, VPNs, device-management systems, and other security services may treat the new iPhone as a new device and require you to sign in again, re-register it, or obtain approval from your IT department. Test these services on the new iPhone while the old one is still available in case you need it to approve a login or transfer an account.
Although Apple works hard to make transferring from an old iPhone to a new one as smooth as possible, some things may not transfer perfectly. We strongly recommend keeping your old iPhone for a week or so to ensure the new one can do everything the old one did. During that time, thoroughly test the new iPhone, checking each app you need. Once you’re confident the new iPhone is working well, follow Apple’s instructions for erasing the old iPhone before selling, trading it in, or giving it away.
(Featured image by Adam Engst)
Social Media: Getting a new iPhone 18? Don’t rush the setup. A little prep work now can save you from missing data, apps, and settings later. Here’s what to do before and after transferring from your old iPhone.