Nine Tips for Switching from an iPhone with Touch ID to One with Face ID

In 2013, Apple added Touch ID to the Home button of the iPhone 5S. Taking advantage of the uniqueness of fingerprints, Touch ID combines the Home button press to wake up the iPhone with a fingerprint scan to authenticate the user. But in 2017, Apple introduced the iPhone X with Face ID, which relies on cameras and sensors at the top of the screen to authenticate the user via facial recognition. Since then, Apple has slowly been phasing out Touch ID in the iPhone line, with only the third-generation iPhone SE still supporting it. (Only the iPad Pro models have Face ID; other iPads have Touch ID in the Home button or the top button.)

We’re not here to dub one better than the other, but many people find themselves needing to upgrade from an older iPhone with Touch ID to a newer one with Face ID. If you’re trying to switch between Touch ID and Face ID, we have some tips to help.

Unlock the iPhone

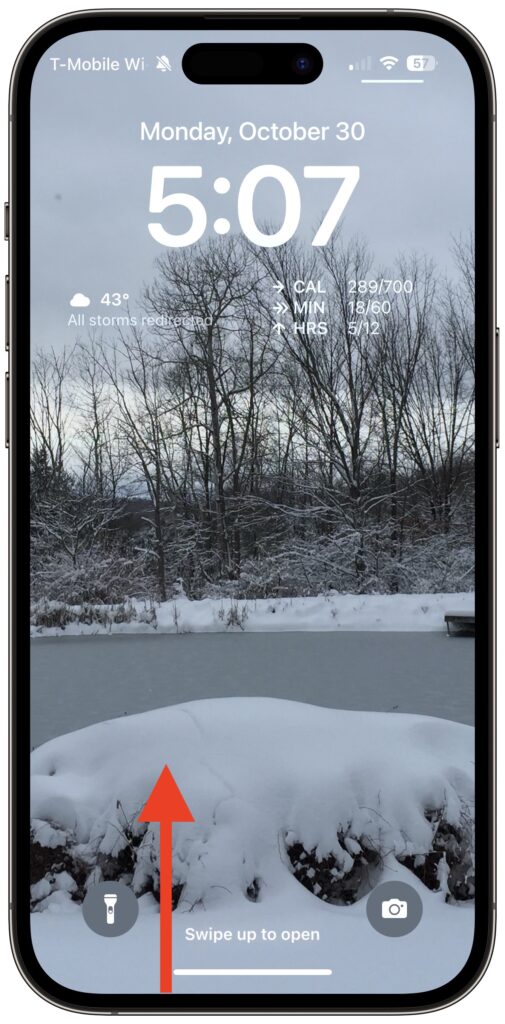
Once the iPhone is awake (the screen is lit up), you unlock an iPhone with Touch ID by pressing the Home button. On an iPhone with Face ID, you swipe up from the bottom of the Lock Screen—a bar reminds you where to start—while looking at the iPhone. Face ID is fast and accurate enough that you’ll notice that authentication is happening only if iOS asks to verify your passcode (which it also does with Touch ID).
Return to the Home Screen

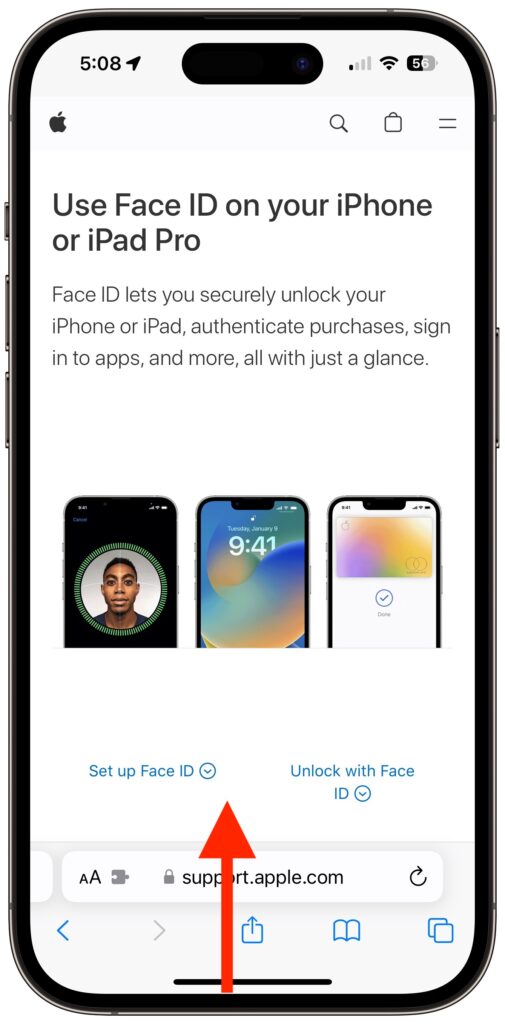
When you’re using an app on an iPhone with Touch ID and want to return to the Home Screen, you press the Home button—logical! On an iPhone with Face ID, you repeat that swipe up from the bottom of the screen action you use to unlock the iPhone. You’ll get really good at it.
Switch between Apps

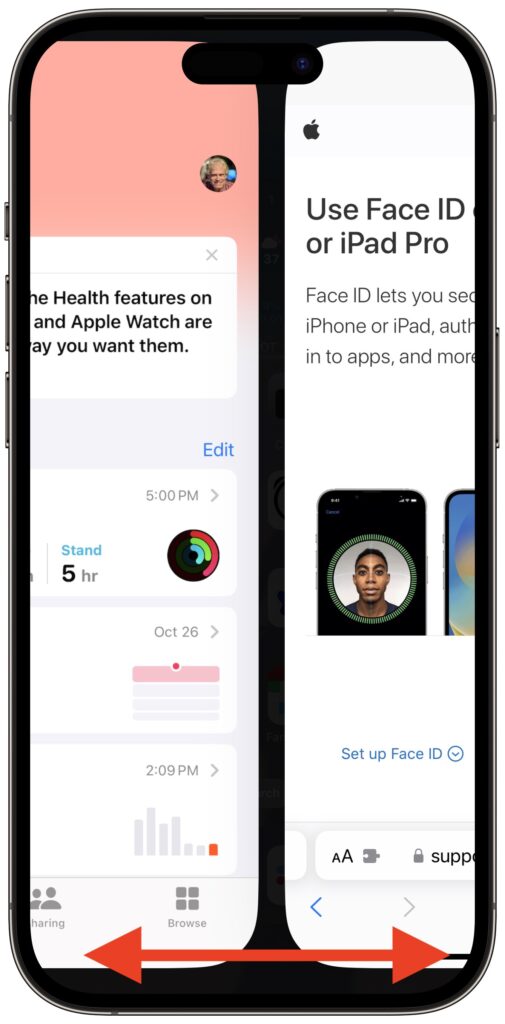
When it comes to switching between apps, iPhones with Face ID offer a unique shortcut. On an iPhone with Touch ID, you must quickly press the Home button twice and then swipe between apps in the App Switcher. Bringing up the App Switcher on an iPhone with Face ID requires swiping up from the bottom of the screen just slightly and then continuing the swipe to the right. But Face ID experts seldom do that. Instead, swipe right and left on the bar at the bottom of the screen to switch between apps—it’s far faster and easier, if hidden.
Activate Siri

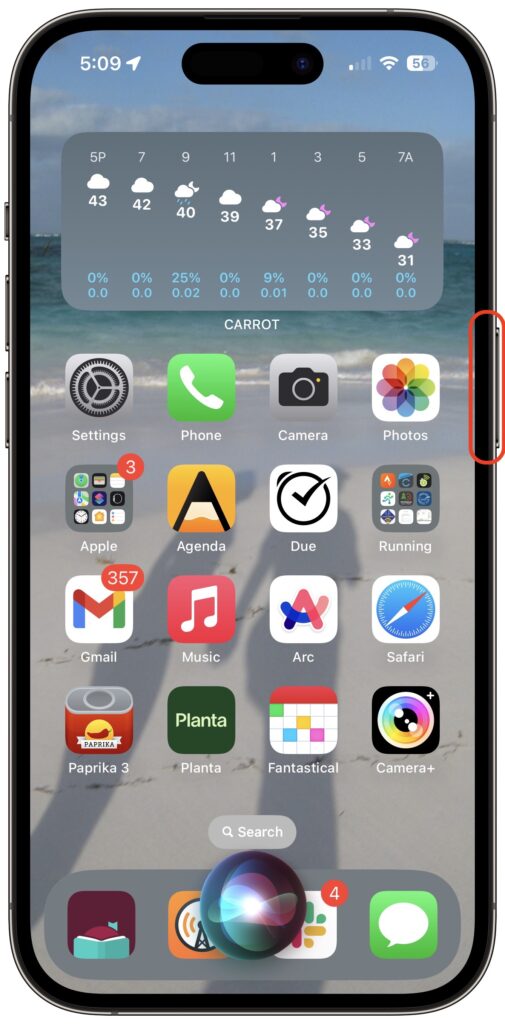
On an iPhone with Touch ID, holding the Home button activates Siri. On an iPhone with Face ID, press and hold the side button to activate Siri. Tomato, tomahto.
Open Control Center

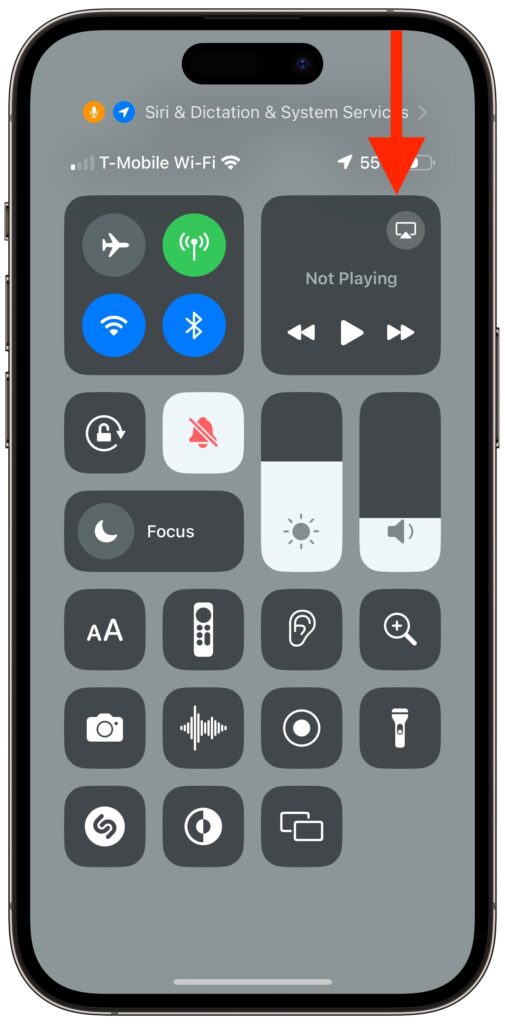
When all we had were iPhones with Touch ID, Apple decided we’d open Control Center by swiping up from the bottom of the screen. Face ID relies on that gesture for unlocking and opening the App Switcher, so on iPhones with Face ID, you instead open Control Center by swiping down from the top right of the screen. Think of it as swiping down from the cellular, Wi-Fi, and battery status icons.
View Notifications

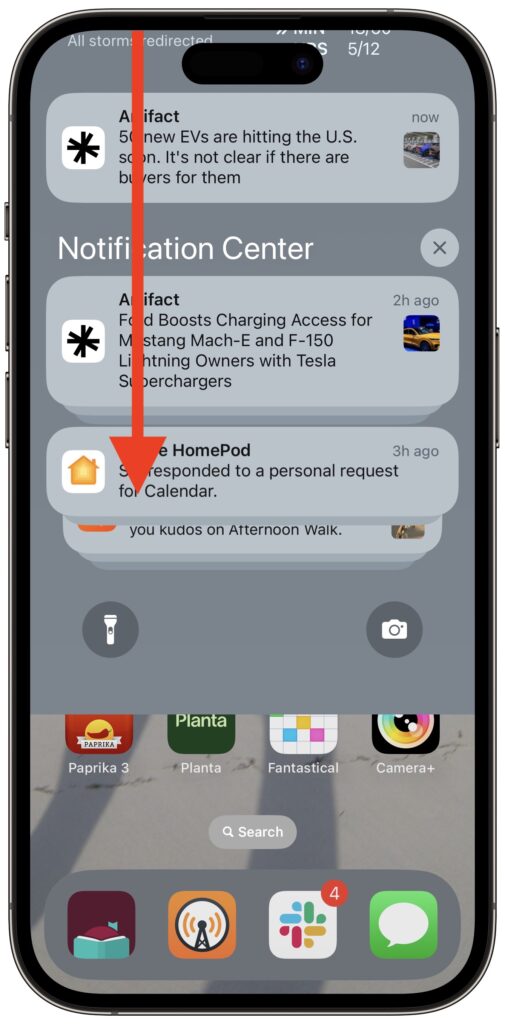
Because iPhones with Touch ID use a swipe up from the bottom for Control Center, they can devote a swipe down from the top of the screen to displaying the Lock Screen with notifications. The same gesture works on an iPhone with Face ID, but you must start from the left side of the screen.
Use Apple Pay

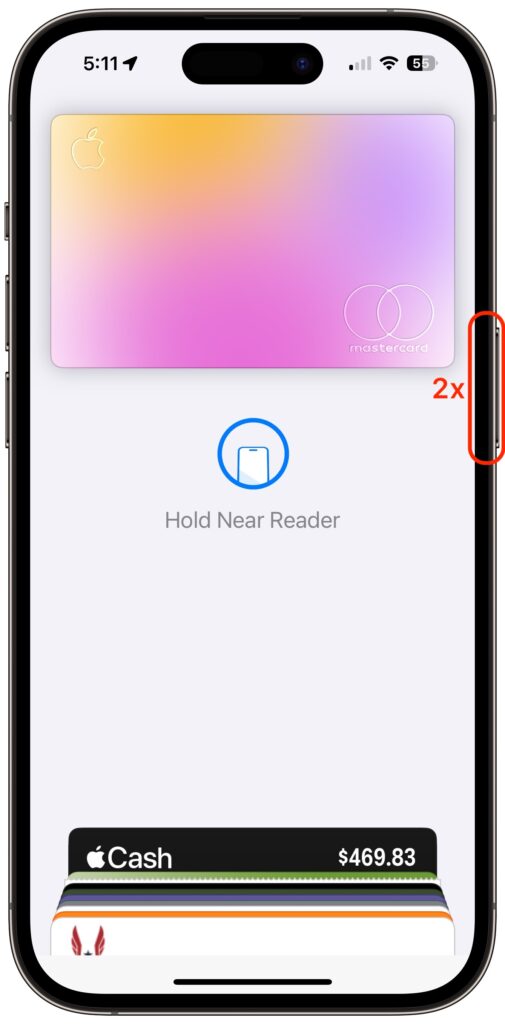
Paying for a purchase with Apple Pay requires that you authenticate, which means placing your finger on the Home button—but not pressing it!—on an iPhone with Touch ID. Getting the hang of the touch-but-don’t-press action can take some time, but once you have it, you may even have developed a habit of not looking at your iPhone to authenticate Apple Pay. In contrast, with an iPhone with Face ID, you must look at the screen when prompted so the Face ID sensors can confirm you’re making the purchase. Honestly, neither is as easy as double-pressing the side button on an Apple Watch.
Authenticate in Apps

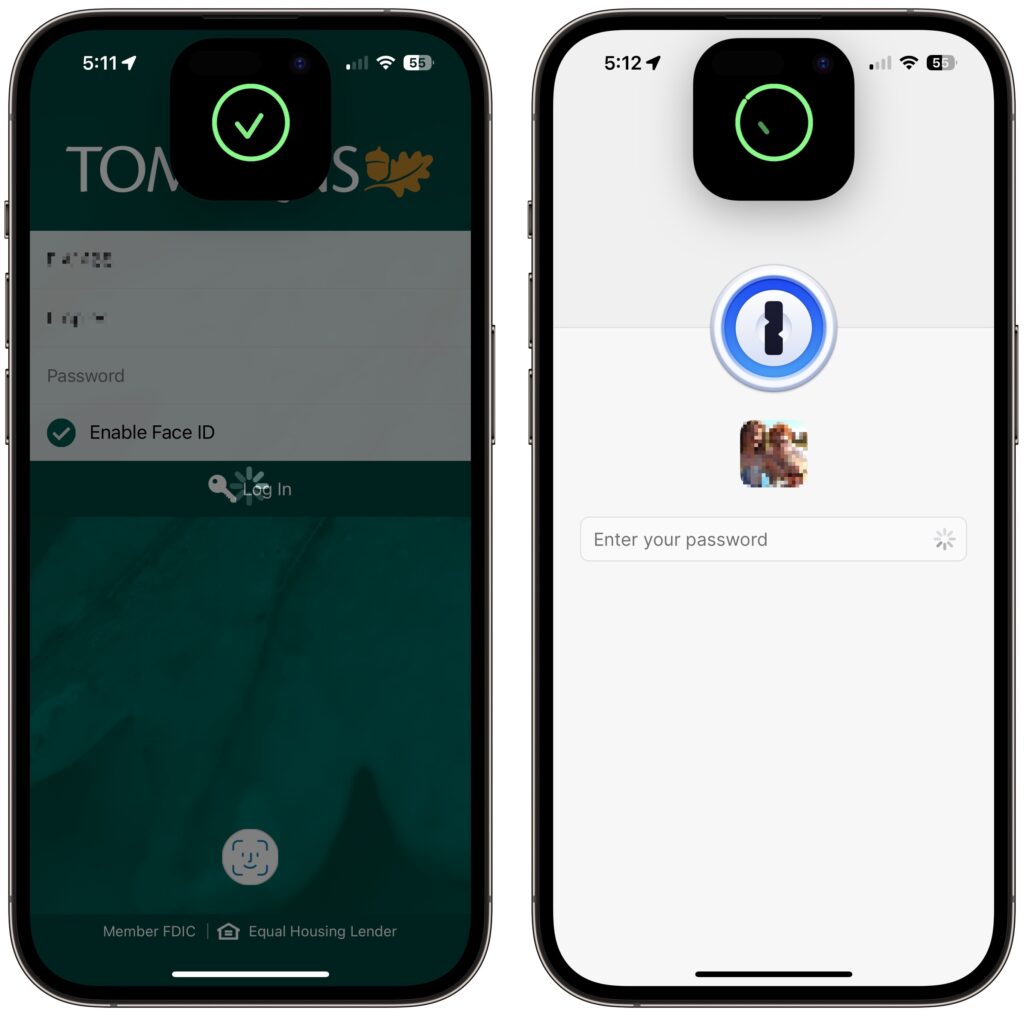
Beyond Apple Pay, plenty of apps from the App Store, like password managers and banking apps, tie into biometric authentication so you don’t have to type lengthy passwords. As you’d expect, if you previously authenticated by touching the Home button, doing so on an iPhone with Face ID requires looking at the iPhone screen. That’s nearly always what you do anyway, so it’s even easier than touching the Home button.
Register Alternate Appearances

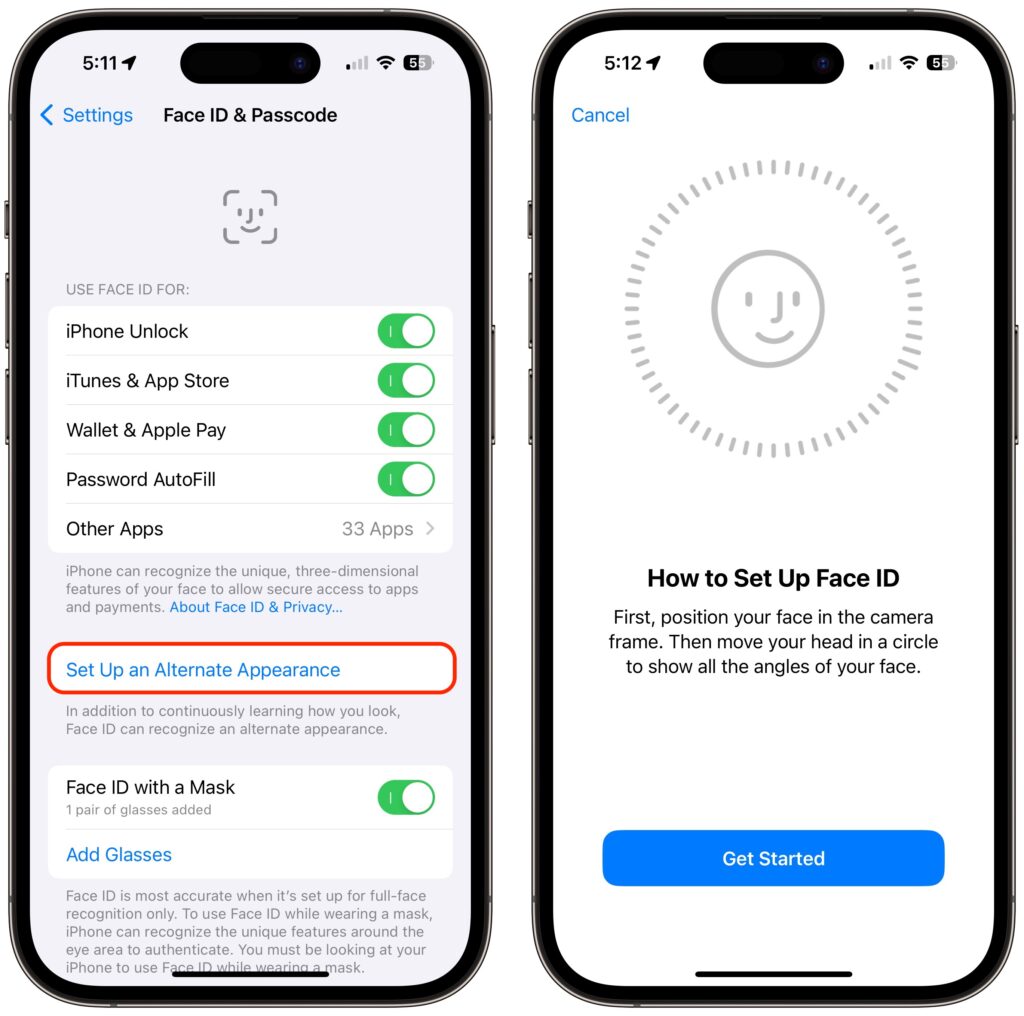
With Touch ID, you can register up to five fingers, which lets you use several of your own and let a trusted spouse or family member authenticate using Touch ID as well. We tend to have more fingers than faces, though, so with Face ID, Apple allows only a single alternate appearance. That shouldn’t be too limiting, but if everyone in your family had a Touch ID finger, sorry, you’ll have to pick a favorite.
(Featured image by Apple)


Social Media: Are you switching from an iPhone with Touch ID to one with Face ID? The challenge of learning new things can intimidate some people, but we have a list of what you’ll need to know. (And some of the changes are better!)


Similar Posts

  • Apple TV and Apple Watch

    This week I’ve been testing out some of the new features on the Apple TV and a bit on the new watchOS. You can now get an Apple Watch for $299.99. The release of watchOS 2.2 was a minor bump in improvements, including the ability to pair more than one Apple Watch to one iPhone, additional browsing options in Maps, improvements to tracking your pulse and a few other minor updates. Unlike past revisions and improvements to the watchOS this one has left me feeling a little underwhelmed. While the software updates weren’t particularly robust, I was excited to see that the Apple Watch now has even more watch bands to choose from. I’ve had my watch for about six months now and have noticed its getting a bit dingy, so now might be a good time to get another band! There are new sport band colors to choose from including a bold new yellow and a new woven nylon option. For those seeking a more traditional style band, the woven nylon might be just what you are looking for, this band features a standard watch buckle style clasp.

    Apple TV got some updates this week and just in time for the NCAA Championship. With the latest software release for Apple TV you can now get the latest NCAA games with an added feature of having two games display on your TV side by side! In addition to being able to watch the latest games, you now have approximately 5000 apps to choose from, including new workout apps. Siri now works better when searching for content, even in the App Store, and you can access your iCloud Photo library. Starting to feel like your apps are getting too cluttered? Easily create folders by dropping app icons onto of each other just like you do on your iPhone or iPad. Dictation, another added feature that can really speak up your search process. Rather than typing through letters one at a time when searching for something specific, you can now use dictation by selecting the Siri button in the search field. I will note, you do have to be in the specific search field, you can’t just use it from the home screen. My favorite updates, one of which works with both the Apple TV and the Apple watch, is the remote app. You can now use your Apple watch to navigate through the options on the Apple TV, a feature that might seem silly to some, but with a small and easily misplaced remote this is bound to be an incredibly valuable new feature. Think the watch is too small to use for a remote? Hook up your Apple bluetooth keyboard! That’s right, you can now use your standard sized keyboard as well.

    I should note, that some of these updates, like the NCAA games, do have additional fees. More and more of us are swaying away from traditional TV and with more options coming to the Apple TV and choosing your content, we are getting closer and closer to paying for only what we want.

  • Do you use iCloud for Safari?

    With all the news surrounding the government’s attempt to force Apple to write software that doesn’t exist to crack an iPhone, iCloud has been in the news, too! Do you use iCloud? Apple has some huge server farms to support this amazing technology and I thought it would be good to do a brief review of some of the features as they relate to Safari.

    iCloud has sort of settled to the back of my mind because it just does its thing in the background and serves up features that I take for granted. But this week, I ran into a dilemma that puzzled me for some time. I noticed that I had accidentally deleted one of my folders in my Safari favorites bar. These were important bookmarks and I needed them back. Well, like a good boy, I have a Time Machine backup and quickly went back in time and restored my Safari bookmarks from a time before I had deleted them. Good stuff, but when I went to look the next morning, the folder was gone again. This happened a few times with me going back in time to get the .plist file. Then I figured it out – I had Safari active in iCloud so my bookmarks were being synced in the cloud. So, every time I restored it, it would eventually be overwritten by iCloud. The solution? Really sort of simple, I turned off Safari in iCloud preferences and turned it back on, problem solved.

    Activating Safari in iCloud gives you some great tools. You can start browsing on your iPad and pick up seamlessly from your Mac or you iPhone. It syncs your bookmarks and tabs and if you also use iCloud Keychain it will remember all those passwords for the websites you visit. If you use the reading list function of Safari it will also keep those current across your devices.

    As with the other features of iCloud, the features only work if you are signed on with the same Apple ID on all of your devices. It won’t know that you are signed onto one AppleID with your Mac and another with your iPhone. Most common issues with iCloud come down to this simple issue. Apple has not made it easy to merge Apple IDs so at least for iCloud you should be consistently using the same Apple ID. Open the iCloud System Preference on your Mac and choose Safari to activate iCloud on your Mac or go to the iCloud Setting on your iPhone or iPad to activate.

    You can also access the Safari tabs that you have open on your Mac on your iPhone or iPad. It is a bit different looking on the iPhone or iPad. Open Safari on your iPhone or iPad and then tap the tabs icon. You will see all of your open Safari windows but if you scroll down at the bottom will be all the tabs open on your Mac and you can click on any of those to make it active.