Learn to Identify and Eliminate Phishing Notifications
Email may be the most common form of phishing, but it’s not the only one. Modern Web browsers support a technology that enables websites to display system-level notifications just like regular apps. These push notifications have good uses, such as letting frequently updated websites inform users of new headlines, changed discussion threads, and more.
Unfortunately, push notifications can be subverted for malicious purposes, notably phishing. Here’s what happens. You visit a website that asks you if you’d like to receive notifications.
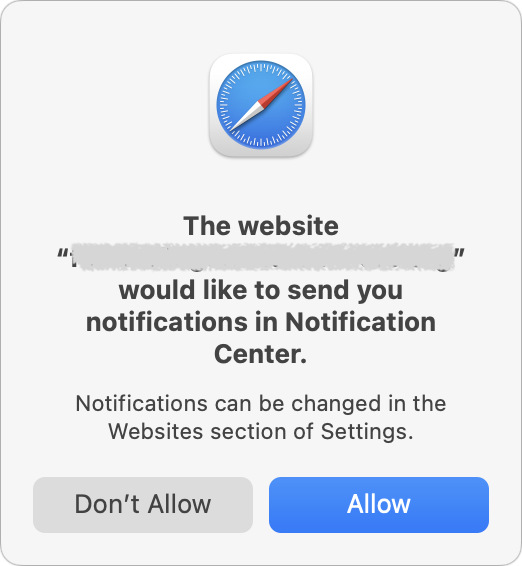
That request may be introduced with language that implies you must agree in order to get desired content, or it may be a bald-faced request to show notifications. If you agree, the website will be able to display alarming or deceptive phishing notifications even when it’s not open.
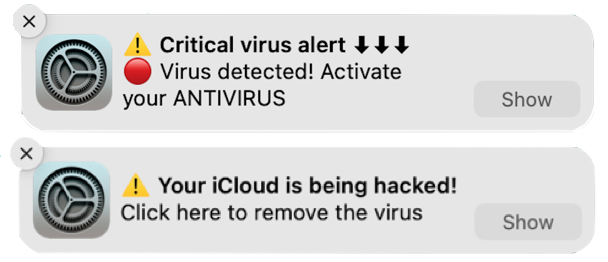
The goal is to trick you into clicking the notification, which will load a fake site that attempts to get you to enter login credentials or credit card information to facilitate identity theft.
The danger of phishing notifications is that they come from the system, so they may seem more legitimate than email messages trying to sucker you into revealing personal information. Nevertheless, as you can see in the examples above, they may still look sketchy in ways reminiscent of phishing emails:
- No legitimate website would use emoji or symbols in a notification, much less multiple ones.
- Although there are no glaring spelling or grammar mistakes, the use of all caps in the top notification is a giveaway. Similarly, standard notifications wouldn’t use exclamation points.
- The use of “Click here” is poor information design that’s unlikely to come from a professional programmer or Web designer.
Phishing notifications, although problematic, aren’t a malware infection, and anti-malware packages won’t detect or remove them. Luckily, they’re easy to control and block in Safari and other Web browsers.
Prevent Phishing Notifications
The easy way to ensure you don’t see phishing notifications is to allow only trusted websites to send notifications. In general, we recommend keeping that list small so you’re not frequently interrupted by unnecessary notifications.
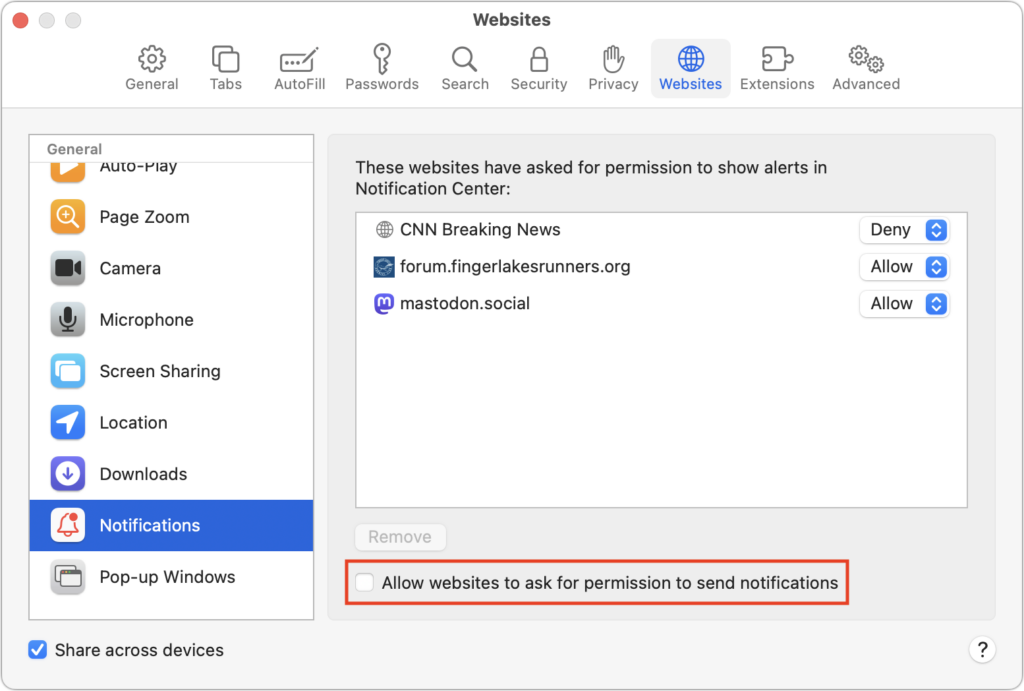
If you’re unsure that you’ll be able to identify malicious websites, you can enable a browser setting that prohibits all websites from asking for permission to send notifications. In Safari, choose Safari > Settings > Websites > Notifications, and deselect “Allow websites to ask for permission to send notifications” at the bottom.
Other browsers have similar options, and most will look like Google Chrome, as shown below:
- Arc: Choose Arc > Settings > General > Notifications and select “Don’t allow sites to send notifications.”
- Brave: Navigate to Brave > Settings > Privacy and Security > Site and Shield Settings > Notifications and select “Don’t allow sites to send notifications.”
- Firefox: Go to Firefox > Settings > Privacy & Security > Notifications and select “Block new requests asking to allow notifications.”
- Google Chrome: Navigate to Chrome > Settings > Privacy and Security > Site Settings > Notifications and select “Don’t allow sites to send notifications.”
- Microsoft Edge: Choose Microsoft Edge > Settings > Cookies and Site Permissions > Notifications and turn off “Ask before sending.”
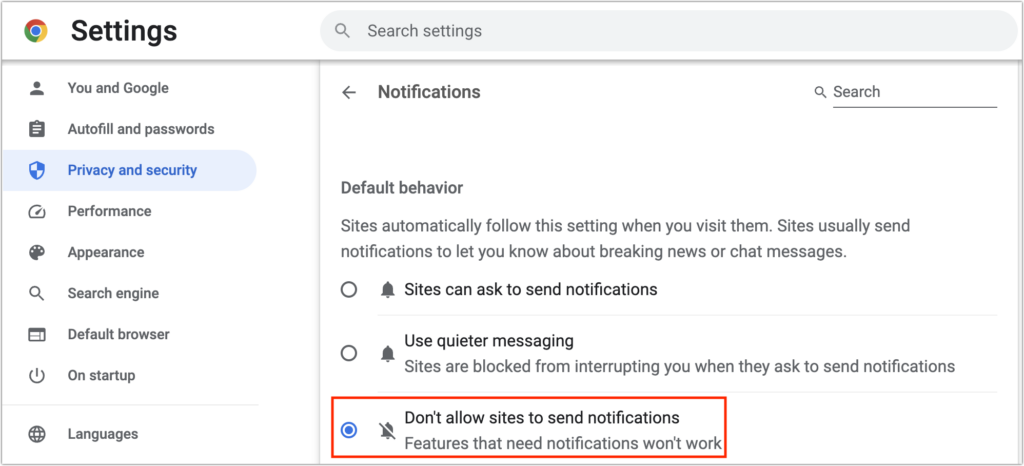
Browsers based on Chrome (everything except Firefox in the list above) offer a “Use quieter messaging” option that replaces the permission dialog with a bell icon next to the site name in the address bar—click it to allow notifications from that site.
Eliminating Phishing Notifications
Now you know how to prevent new sites from requesting permission to display notifications. What about sites that already have permission? It’s easy to block them in Safari’s Notifications settings screen. If you have any undesirable sites with Allow in the pop-up menu to the right of their name in the Notifications screen, choose Deny from that menu. You could remove the site instead, but that would allow it to ask for permission again.
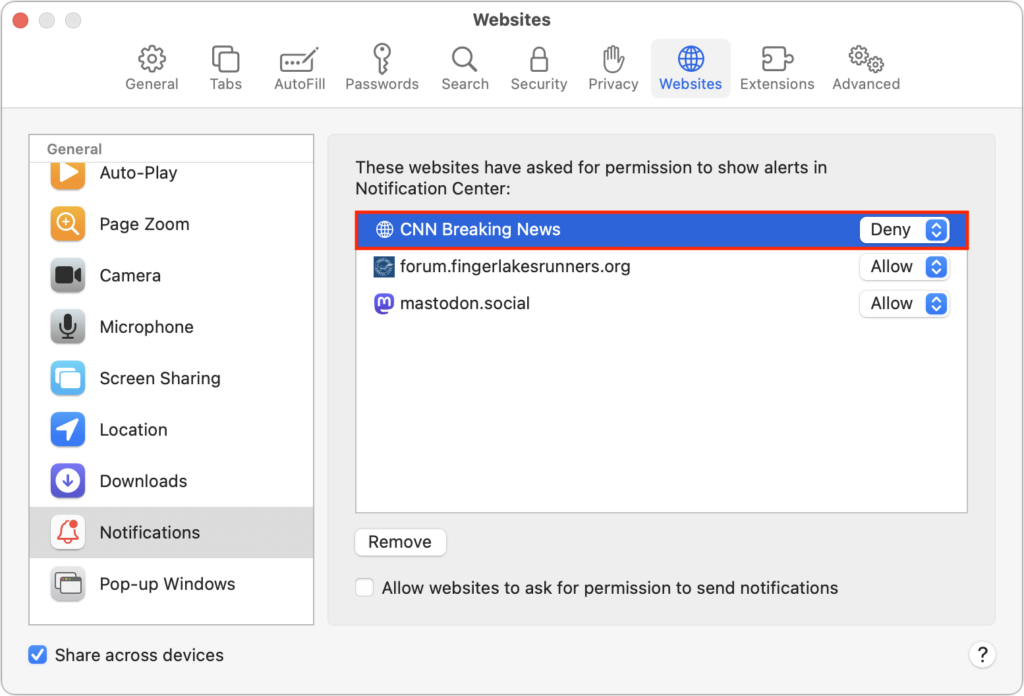
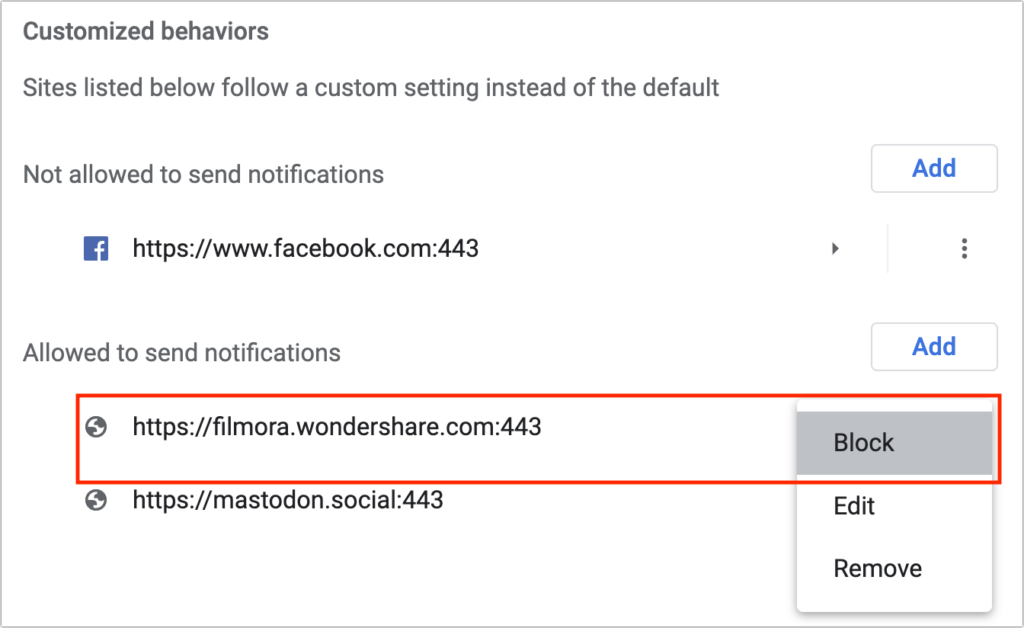
Firefox’s interface is similar to Safari’s, but Chrome-based browsers have a different interface that separates the blocked and allowed sites. To block a website whose notifications you no longer want to receive, click the button to the right and choose Block. Again, you could remove undesirable sites if you prefer, but remember that if your notification settings ever change, doing so could allow the site to ask for permission once more.
Ultimately, it’s easy to avoid phishing notifications by paying attention as you browse the Web. Steer clear of websites that make an unexpected request to display notifications. Notifications aren’t necessary on hardly any websites, so there’s no harm in denying such requests unless you’re sure they’re legitimate.
(Featured image based on an original by iStock.com/tadamichi)
Social Media: Did you know that a phishing website can send you a notification right on your Mac? Learn how this could happen and how to prevent it in your favorite Web browser.