Four Solutions to Gotchas in macOS 14 Sonoma
We’re seeing an increasing number of people switching to macOS 14 Sonoma, and for the most part, things are going well. However, Apple introduced some new features—and turned them on by default—that are causing some consternation. If you’ve switched to Sonoma or are planning to soon, here are four features you might want to know about.
Hide Windows when Clicking on the Desktop
The most immediately surprising thing you’ll notice when you upgrade to Sonoma is that clicking an empty area on the desktop moves all windows off to the side to give you full access to icons and widgets on your desktop. It’s not a bad feature, but if you’re accustomed to clicking the desktop simply to switch to the Finder, it can be off-putting. To keep windows where they are, open System Settings > Desktop & Dock, and under Desktop & Stage Manager, where it says “Click wallpaper to reveal desktop,” choose Only in Stage Manager.
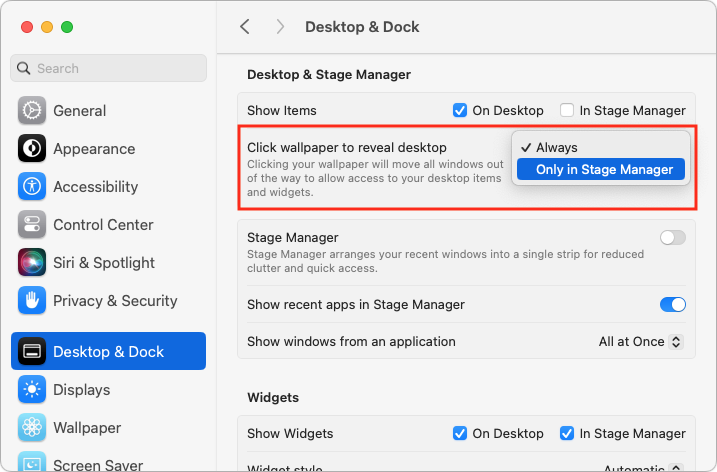
Apple has introduced additional interlocking settings here, so you might want to play with them to see if they support your preferred working style. In particular, note the Show Items checkboxes—if you don’t like seeing all your desktop icons, deselect the On Desktop box to make those icons appear only when you click the desktop.
Print Queue Apps Are Now Part of Print Center
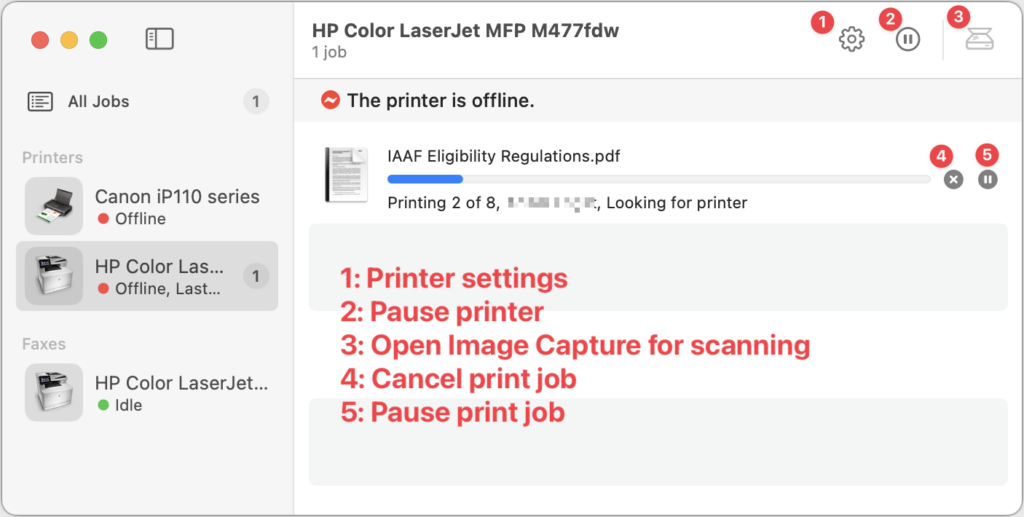
For many years, when you printed from a Mac, a print queue app launched to show the progress of your print job and quit automatically once the job was completed. Some people kept those print queue apps in the Dock afterward, perhaps as a way of accessing a multifunction printer’s scanner. Upgrading to macOS 14 Sonoma broke those Dock icons because individual print queue apps have been replaced by the new Print Center app.
Print Center now launches automatically to show print job progress, but you can also open it manually from the Application folder’s Utilities folder. It also offers options to manage the printer and launch Image Capture, Apple’s default interface for scanning. If you’ve been surprised by printing changes in Sonoma, take a few minutes to familiarize yourself with Print Center.
Gestures Can Trigger Fireworks and Other Effects
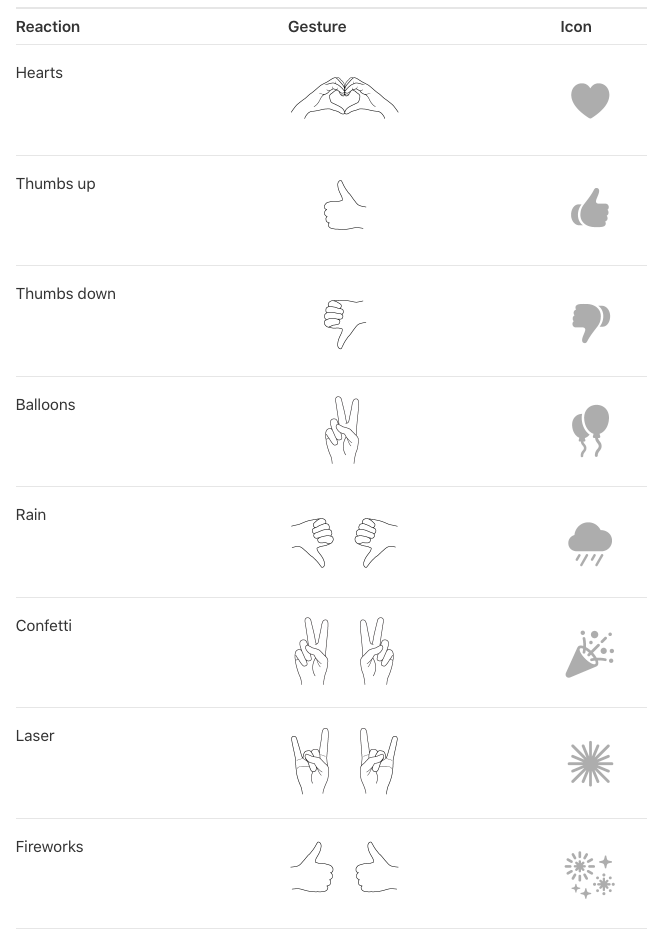
In Sonoma, when you’re in a video call using FaceTime, Zoom, Webex, or another supported videoconferencing app, making certain hand gestures will trigger special effects. (This works only on a Mac with Apple silicon or when using an iPhone as your webcam.) These reactions are fun… except when they’re not. A double thumbs-down gesture that generates rain during a therapy session may be utterly inappropriate, and causing balloons to fall during a serious business meeting just because you inadvertently made a V with your index and middle fingers might not be considered amusing. Here are the gestures and what they trigger.
To ensure you don’t accidentally generate a reaction with a stray gesture, click the green video camera icon that appears in your menu bar when using one of the apps that supports reactions. (You must be actively sending video—just having the app open may not be sufficient to make the green icon appear.) Then click Reactions under your preview so it goes from having a green icon to a gray icon. Reactions are now disabled. That app should remember your preference, but you’ll have to turn off reactions separately in every app where they’re available.

New Privacy Awareness Icons
That green video camera icon that appears in your menu bar when sending video in Sonoma isn’t the only one that can appear in that spot, and we’ve fielded questions from people who are surprised and confused by these icons appearing. Don’t worry; they aren’t an indication of malware on your Mac! Apple added them so you’d always be aware when an app was using your Mac’s camera or microphone, or recording the screen. You can think of them as an expansion of the tiny green LED that lights up next to the Mac’s camera when it’s in use.
![]()
The three icons you might see are:
- Green camera, which indicates that the Mac’s video camera is in use. The microphone may also be active, but that’s not indicated separately.
- Orange microphone, which shows that the Mac’s mic is recording audio.
- Purple screen, which tells you that an app is recording your screen. Beyond screen-sharing apps, other apps like screenshot utilities can trigger this icon.
Click the icon to see what app is involved. You could even see multiple apps listed at the top, if several apps are recording the screen, for instance.
If you’ve switched to Sonoma already, we hope this quick tour of a few potentially confusing features has helped explain what’s going on. And if you’re still waiting to install Sonoma—which is fine!—remember to come back to this article when you decide to upgrade.
(Featured image based on an original by iStock.com/fizkes)
Social Media: Some of the new default features in Sonoma have caused confusion. We explain why windows hide when you click the desktop, where printer queue apps went, how to turn off the new reaction gestures, and the privacy awareness icons.