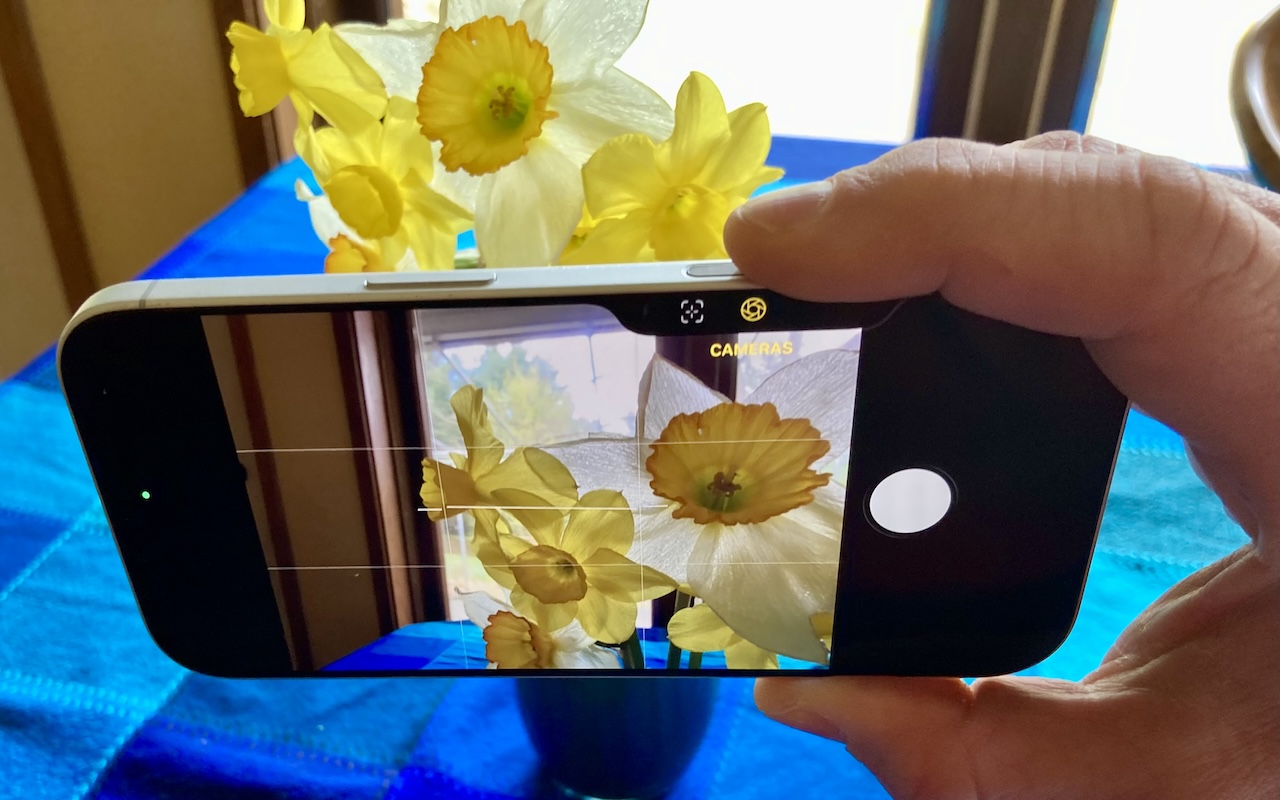
Customize the Camera Control on Your iPhone
The Camera Control on iPhone 16 and later models lets you open the Camera app and take a photo with the press of a button. But it’s more than just a simple button—it features a touch-sensitive surface that lets you adjust a variety of settings without having to tap the screen.
To access the controls, you either lightly press the Camera Control or swipe along it. From there, lightly double-press to enter a setting, swipe to adjust it, and lightly double-press again to go back. A full press takes a photo no matter where you are in the controls.

While the Camera Control’s default configuration provides access to everything it can do, that can be overwhelming for people who want to take quick snapshots without inadvertently changing settings like exposure and depth. We recommend taking a spin through the options in Settings > Camera > Camera Control to configure it for your needs. Here’s what each option does and when you might want to change it.
Launch Camera
Although most people use Apple’s Camera app, you can configure the Camera Control to open other camera apps as well. (Plus, if you want to disable the Camera Control entirely, select None.) Apps must be specifically designed to work with the Camera Control, so not all third-party camera apps will appear in this list.

Click to Open Camera
By default, a single click on the Camera Control opens the Camera app. If you often find yourself accidentally opening the camera—perhaps when pulling it from a pocket—you can switch to Double Click, which requires two presses to launch the app.
Require Screen On
The Require Screen On switch provides another way to reduce inadvertent camera activations. When selected, pressing the Camera Control opens the Camera app only if the screen is already on. If it’s not, the first press of the Camera Control turns on the screen and a second press opens the Camera app. Leave this switch off if you want one-click access to the camera even when the iPhone’s screen is off—ideal for the fastest shots.
Customize Controls
Along with launching the Camera app and taking a photo, the Camera Control lets you access and adjust numerous camera-related settings using its touch-sensitive surface. If you often find yourself accidentally enmeshed in camera settings when you just want to take a photo, consider turning off Camera Adjustments entirely.
But for those who like tweaking settings, the Camera Control provides a shortcut that doesn’t require tapping the screen. In the Customize screen, you choose which settings appear when you lightly press the Camera Control while using the camera.
Above the list of controls, you’ll find a gesture setting that determines how you access them—via a light press, a long swipe, or both. You can choose one or both, but turning both off blocks access to the controls entirely.

The available controls include:
- Exposure: Brightens or darkens the overall scene
- Depth: Adjusts background blur intensity
- Zoom: Switches between zoom levels
- Cameras: Switches between the front camera and the rear cameras
- Styles: Changes the active Photographic Style
- Tone: Adjusts the mood by lightening or deepening tones
You can turn each setting on or off and drag them into your preferred order. If you rarely use Tone but frequently take selfies, for instance, you might turn off Tone and move Cameras to the top of the list. Fewer options mean faster access to the ones you actually use.
Don’t feel shy about using only one or two controls, or about turning off the adjustments completely. There’s nothing worse than missing a great photo because you’ve inadvertently gotten lost in the controls.
One final note: enabling the Clean Preview switch hides the Camera app’s on-screen buttons and overlays—like the shutter button, zoom controls, and mode switcher—while you’re making adjustments using the Camera Control, giving you an unobstructed view of the scene.
Lock Focus and Exposure
When enabled, this option lets you lock both focus and exposure. Lightly press and hold the Camera Control, and then keep your finger on it to maintain those focus and exposure settings as you reframe the shot. (You’ll see AE/AF LOCK at the top of the viewfinder.) This option can be useful when shooting a subject against a bright background or in changing light conditions—the camera won’t readjust as you reframe. Release your finger to unlock. If you’ve never needed this feature, leave it off to simplify Camera Control behavior.
Launch Visual Intelligence
There are two more settings at the bottom of the Camera Control settings screen. Outside of actively shooting a photo, pressing and holding the Camera Control provides access to Visual Intelligence, the Apple Intelligence feature that lets you point the camera at an object and learn more about it. It can be a quick way to ask ChatGPT about something you see or do a Google search for similar items, but if you don’t find it useful, turn it off.

Accessibility Options
This option is a shortcut to Settings > Accessibility > Camera Control, where you can adjust the pressure sensitivity and timing for the light press, light double-press, and double-click gestures. If you find the Camera Control too sensitive or not responsive enough, these options let you fine-tune it to match your preferences.
Overall, we like how the Camera Control makes it easier to take photos quickly, but from what we’ve seen, many people get confused by the many possible adjustments. If that’s you, turn them off so the Camera Control becomes a straightforward shutter button.
(Featured image by Adam Engst)
Social Media: The Camera Control on the iPhone 16 and later is more than a shutter button—it’s a touch-sensitive shortcut to zoom, exposure, depth, and more. Here’s how to configure it so it works for you or doesn’t get in your way.