iPadOS 26 Brings Mac-Like Multitasking to the iPad
When the iPad debuted, it was essentially a large iPhone. But classic productivity tools rapidly made their way to the iPad, and over the years, Apple has introduced multitasking features, such as Slide Over and Split View, to make it easier to work back-and-forth between apps—imagine writing in Pages while referring to a Web page, or entering data from a PDF into a Numbers spreadsheet.
In iPadOS 26, Apple acknowledged that many of those efforts fell short of user expectations and completely revamped the iPad’s multitasking, basing it mainly on the windowing approach we’re all accustomed to on the Mac. Even better, if you prefer the traditional one-app-at-a-time approach, you can stick with that entirely.
Here’s how to get started with windowed apps in iPadOS 26.
Turn on Windowed Apps
When you upgrade to iPadOS 26, you’re prompted to turn on windowed apps, but you can always turn the feature on or off later in Settings > Multitasking & Gestures.

Switch Between Apps
Switching between windowed apps relies on approaches familiar from the Mac and previous versions of iPadOS. You can:
- Switch from the Home Screen: If you’re not already there, swipe up from the bottom of the screen, and then tap an app icon on the Home Screen. Swipe right to see more Home Screen pages or get to the App Library, which holds all apps.
- Switch from the Dock: Either swipe up from the bottom edge of the screen to return to the Home Screen or swipe up just far enough to reveal the Dock, then tap the desired app. Tap the rightmost icon on the Dock to reveal the App Library.
- Switch by swiping: Just as on the iPhone, swiping right or left on the bottom of the screen switches you between recent apps. Or you can swipe right or left with four or five fingers.
- Switch using Exposé: Swipe up from the bottom of the screen, pause in the center, and lift your finger to activate Exposé, which shows all open apps (and windows, if an app has more than one open). Swipe right or left to see more. Tap an app to switch to it. If you have an external keyboard, you can press the Exposé key or Globe-Up Arrow to enter Exposé.

Work with Windows
By default, even in windowed apps mode, apps open full-screen. But now you can do much more, just like you do on the Mac. iPadOS windows now have the same traffic light buttons as macOS windows, and they work the same way. If you don’t see them in a full-screen app, swipe down from the top of the screen to see the controls in the menu bar.
- Resize windows: Drag any window corner to resize. You’ll see a handle only in the bottom-right corner, but any corner works. Or touch and hold the traffic light buttons and choose a Move & Resize option. When windows are arranged, you can drag the slider between them to adjust their sizes.

- Move windows: Drag the top edge of a window. You can drag it partially off-screen to make more room.
- Close windows: Tap the traffic light buttons to expand them, and then tap the red Close button to close the window for good.
- Minimize windows: Tap the traffic light buttons, and then tap the yellow Minimize button to hide the window. You can also start dragging a window, and then flick it into the Dock.
- Reveal hidden windows: Touch and hold the app’s icon in the Dock, and then choose a window from the Open Windows part of the menu. Alternatively, choose Show All Windows and then tap the desired window.
- Zoom windows: Tap the traffic light buttons, and then tap the green Zoom button. Or just drag a corner of the window to expand it until it occupies the entire screen.
- Arrange windows: Touch and hold the traffic light buttons, and then choose a Fill & Arrange option. Alternatively, to put two windows side by side, start dragging a window and flick it to the side of the screen. Then flick another window to the other side.
- Open new windows: Touch and hold the app’s icon in the Dock, and choose New Window.
Too much to remember? Although most of these techniques are nearly identical to how things work on the Mac, there’s another Mac-inspired interface element to help: the menu bar.
Use the Menu Bar
To reveal the menu bar for the app you’re in, swipe down from the center of the screen. (This gesture works differently on the Home Screen, where swiping down from the middle reveals Notification Center instead.) If you’re using a trackpad or other pointing device, you can also move your pointer to the top of the screen.
Every app will have a menu bar, but only those updated for iPadOS 26 will have custom menus; everything else will use standard menus like File, Edit, Format, View, Window, and Help. Apps tend to offer roughly the same menu items as they have on the Mac.
Using the menu bar works just like it does on the Mac: tap a menu to open it, and then tap an item to choose it. For those getting used to windowed apps in iPadOS 26, the big win is the Window menu, which lays out all the options discussed above.

Use Slide Over
In the initial release of iPadOS 26, Apple removed Slide Over, which allowed the user to keep a window floating over other apps and move it off-screen and back easily. After an outcry from iPad users accustomed to using it as a place to stash reference materials and other windows they wanted quick access to, Apple brought Slide Over back in iPadOS 26.1.
To put a window into Slide Over, swipe down to reveal the menu bar, tap the traffic light buttons, and choose Enter Slide Over. Once a window is in Slide Over, you can flick it to either the right or left side of the screen to hide it—a little handle briefly reminds you it’s there—and swiping in from that side of the screen reveals the Slide Over window again. Slide Over windows can be resized like any other window by dragging a corner. Only one app can be in Slide Over at a time; choosing Enter Slide Over in a different app replaces the current Slide Over app. You can also touch and hold the traffic light buttons in the Slide Over app and choose Exit Slide Over to make it a standard window again.

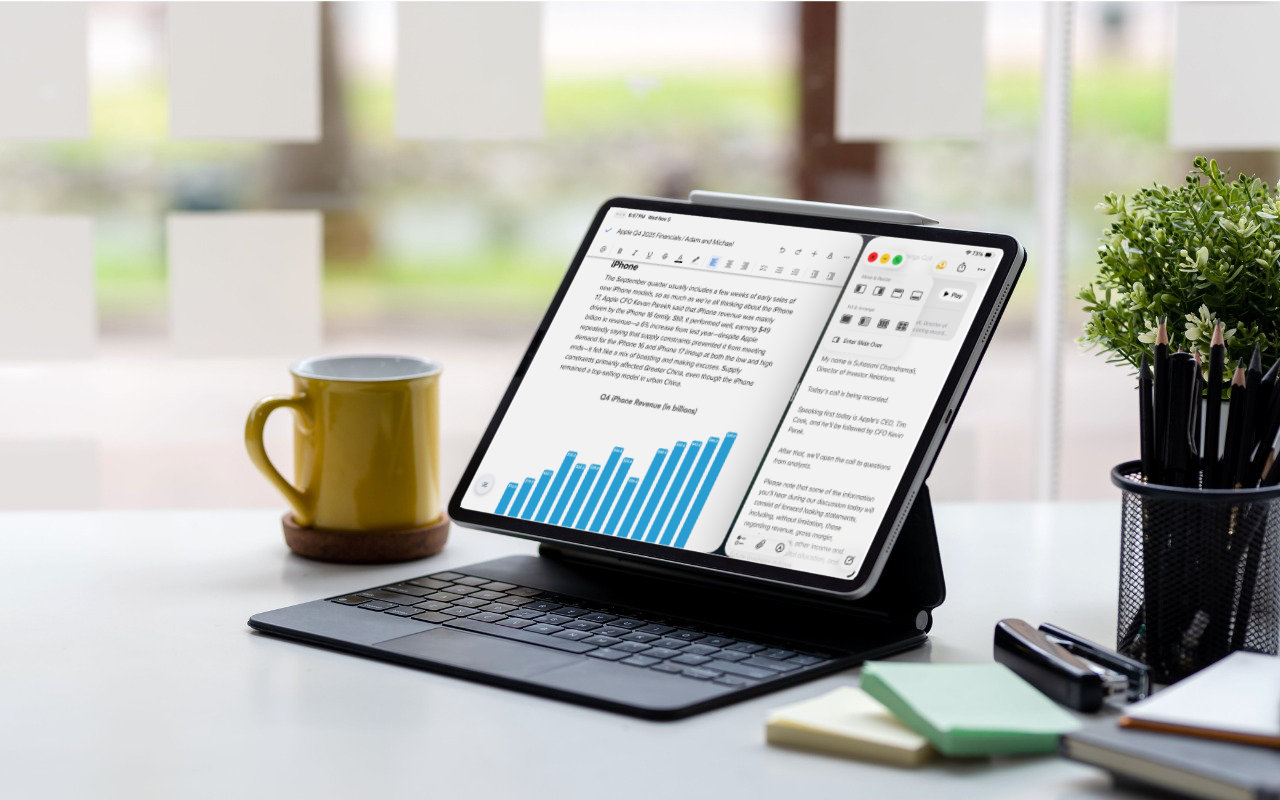
If iPadOS 26’s new approach to multitasking feels like it will improve your iPad productivity, and you don’t already have them, consider adding a keyboard and trackpad. The combination of faster typing, more precise pointing, and Mac-like multitasking can go a long way toward improving your iPad workflows.
(Featured image based on an original by iStock.com/AmnajKhetsamtip)
Social Media: iPadOS 26 finally brings Mac‑style multitasking to the iPad. Learn how to enable windowed apps, use the new menu bar, work with windows, and master Slide Over (back in iPadOS 26.1) for faster workflows.