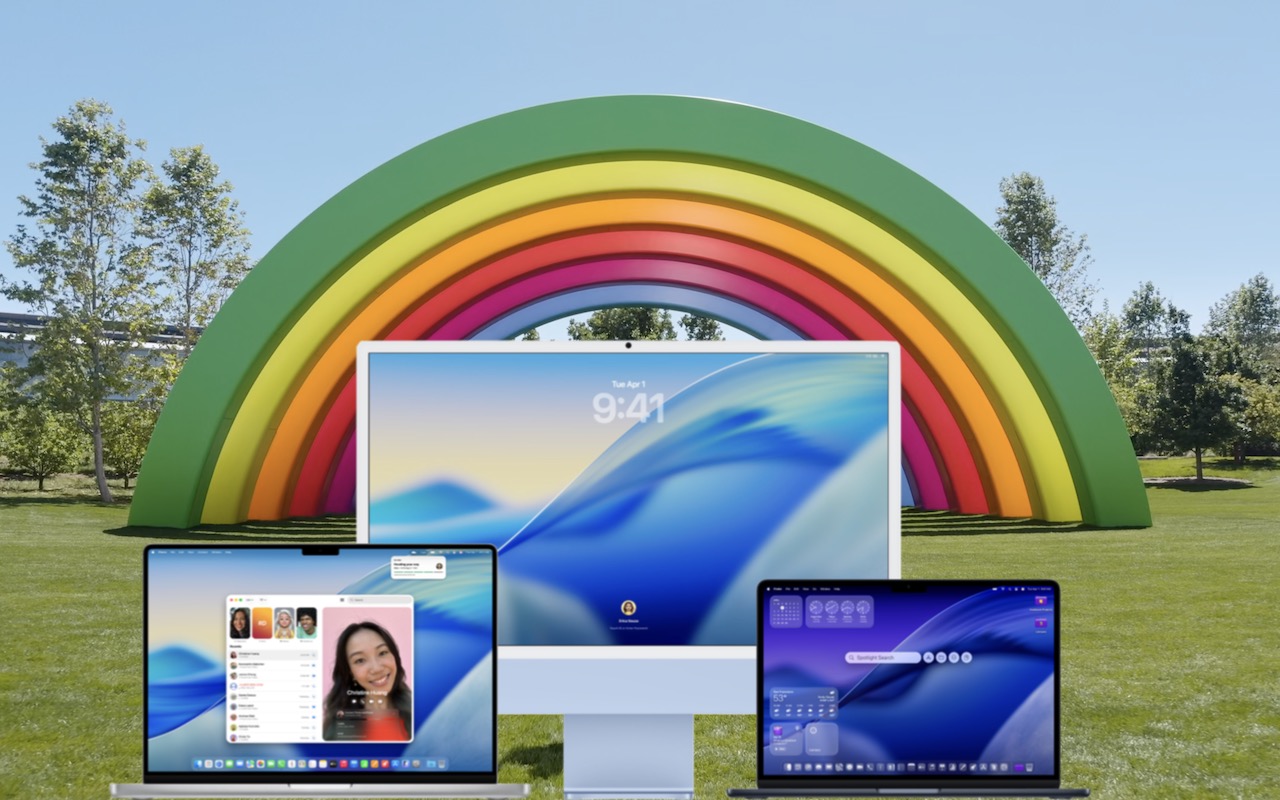
Upgrade to macOS 26 Tahoe When You’re Ready

Apple has now sufficiently refined macOS 26 Tahoe to make an upgrade worthwhile for interested users. You don’t need to upgrade immediately, but there are no strong reasons for most people to delay further.

Unlike last year, when Apple was releasing new Apple Intelligence features with each macOS 15 Sequoia update, the company launched nearly all the promised new features in Tahoe with version 26.0. There’s no need to wait for the more personalized Siri upgrade Apple promised for 2026—we won’t know how good it is until it ships.

Tahoe is now stable and polished enough for most users to upgrade with confidence, particularly on Apple silicon Macs. While there are some minor concerns—such as dissatisfaction with Liquid Glass, higher baseline resource usage, a few battery and performance issues, and the removal of Launchpad—none are deal-breakers. Of course, Apple will continue releasing macOS updates in 2026. You can expect macOS 26.3 in January, 26.4 in late March or early April, and 26.5 in May, along with several security and bug-fix updates in between.

Although Tahoe is ready for prime time, you can still delay the upgrade as long as you’re running macOS 14 Sonoma or macOS 15 Sequoia and are staying current with Apple’s security updates. Older macOS versions no longer receive security fixes, making them more vulnerable to attacks. Possible reasons to continue delaying include:

  • You’re too busy: The upgrade process will take a few hours, plus some additional time to configure everything properly afterward. When you’re ready to upgrade, aim for when a little downtime won’t be a problem.
  • You rely on incompatible software: Most modern apps should now be updated for Tahoe—Adobe recently qualified its Creative Cloud apps. But if a necessary app is known to have issues, you’ll need to wait for an update or find an alternative that works.

Despite the visual changes from Liquid Glass, using Tahoe remains straightforward—it’s still macOS. Even if you’re not an immediate fan of Liquid Glass, Tahoe has new features that might appeal to you. Control Center is now fully customizable, and you can make folders easier to identify by assigning them colors and badges. Spotlight has become an even better app and action launcher, and it now includes access to your clipboard history, a feature previously available only with third-party software. The Phone app has come to the Mac, allowing you to make and take phone calls on your Mac as long as your iPhone is nearby. Live Translation automatically translates text in Messages, provides translated captions in FaceTime, and offers real-time spoken translations in the Phone app.

Before You Upgrade

Once you’ve decided to upgrade to Tahoe, you have three main tasks:

  • Update apps: Make sure all your apps are up to date. If you regularly delay updates, now’s the time to let them complete so you have Tahoe-compatible versions.
  • Clear space: Tahoe may require up to 25 GB of free space to upgrade, and the Tahoe installer itself can take up to 17 GB, so we recommend ensuring you have at least 50 GB free. Don’t cut this close—you should always have at least 10–20% free space for virtual memory, cache files, and breathing room. Check by choosing System Settings > General > Storage; in earlier versions of macOS, choose About This Mac from the Apple menu and click Storage. System Settings provides quick ways to free up space. For iCloud Drive users, another easy way to save space is to Control-click large folders and choose Remove Download to “evict” the local versions of those files temporarily; Box, Dropbox, and Google Drive have similar features.
  • Make a backup: Never install a macOS update or upgrade without first making sure you have at least one current backup. Ideally, you should have a Time Machine backup, a data-only duplicate, and an Internet backup. This way, if something goes wrong, you can easily revert.

Upgrading

After finishing those tasks, make sure you won’t need your Mac for a few hours. There’s no way to know precisely how long the upgrade will take, so don’t start an upgrade if you need your Mac soon.

To start the upgrade, go to System Settings > General > Software Update in Sequoia, Sonoma, or Ventura (System Preferences > Software Update in previous versions of macOS), click the Upgrade Now button, and follow the prompts. For more help, see Joe Kissell’s ebook Take Control of Tahoe.

After You Upgrade

One reason to set aside ample time for your Tahoe upgrade is that cleanup tasks typically follow. We can’t predict exactly what you’ll encounter—it depends on your current macOS version and the apps you use—but here are a few scenarios we’ve seen before:

  • macOS may prompt for your Apple ID password and your Mac’s login password. If you have multiple Macs, you may also need to approve the upgrade from another Mac signed in to the same Apple Account. Don’t worry that malware has compromised your Mac—these authentication prompts are normal.
  • Some apps may request additional permissions even if you previously granted them. Again, that’s okay.
  • If you use your Apple Watch to unlock your Mac and apps (and you should; it’s great!), you may need to re-enable that feature in System Settings > Touch ID & Password (or Login Password on a Mac without Touch ID). In older versions of macOS, it was located in System Preferences > Security & Privacy > General.
  • If you use Gmail, Google Calendar, or other Google services, you might need to log in to your Google account again.
  • Websites that remember your login state will likely require you to log in again. However, if you’re using a password manager like Apple’s Passwords or 1Password, that’s easy.
  • You might need to re-enable text message forwarding to your Mac. You do this on your iPhone by going to Settings > Apps > Messages > Text Message Forwarding.

With the housekeeping done, it’s time to check out all the new features in Tahoe!

(Featured image by Apple)


Social Media: When should you upgrade to macOS 26 Tahoe? There’s no rush to install it today, but we believe it’s safe for those who want to take advantage of the new features. Here’s what to do before, during, and after the upgrade.
Similar Posts

  • A Swinging Hot Spot in Paradise

    You are visiting Key West, accompanied by your trusty iPhone and MacBook Air. Suddenly there’s an emergency at work, and you need to get online with your Mac. You can pick up a cell signal with the iPhone, but there’s no Wi-Fi that isn’t locked up. Well, my first thought might be “oh well, I’m on vacation!” but you are dedicated and need to be online.

    Don’t worry! You can use your iPhone’s cellular data plan to create a personal Wi-Fi hotspot that lets your Mac access the Internet through your iPhone. Also called “tethering,” it’s fast, easy, and can be a life-saver when you just have to get online with a Mac or your Wi-Fi-only iPad. It supports up to 5 users, too, which means you can get your team online, too!

    Before we explain how to do set up a personal hotspot, note that most but not all cellular carriers allow tethering on existing plans. For some, you might have to pay more for tethering. Keep in mind that any data consumed by your Mac while tethered will count against your data allowance and may generate overage fees. Carriers with “unlimited” data, like T-Mobile and Sprint, generally throttle your bandwidth to slower speeds if you use too much data.

    Along those lines, if you use a file sharing service like Dropbox or Google Drive, or an Internet backup service like CrashPlan or Backblaze, turn them off before connecting. Particularly if they haven’t connected in a while, those services can transfer a lot of data quickly, which could result in a hefty overage charge or awkward data throttling for the rest of the month.

    With those warnings out of the way, follow these steps in iOS 9 to turn on Personal Hotspot:

    1. On your iPhone, if you’ve never enabled the feature before, go to Settings > Cellular > Personal Hotspot. Once you’ve turned Personal Hotspot on once, it moves up a level, so you can access it from Settings > Personal Hotspot.
    1. Tap on Wi-Fi Password and enter a password that’s at least 8 characters long and easy to type. It doesn’t need to be super secure because you can keep Personal Hotspot turned off unless you’re using it. But you do want a password so random people nearby can’t connect and use your data.
    1. Once you’ve entered a password, slide the Personal Hotspot switch.

    That’s it! The Personal Hotspot screen provides basic instructions for connecting to the iPhone via Wi-Fi, Bluetooth, and USB. Stick with Wi-Fi, since it’s the easiest and most reliable in most cases.

    • To connect to your new Personal Hot Spot on your Mac, click the Wi-Fi icon in the menu bar and choose your iPhone’s name.
    • On your iPad, go to Settings > Wi-Fi and choose your iPhone.
    • Enter your password when prompted, making sure to select Remember This Network. That way, you won’t even have to enter your password the next time.
    • The Mac or iPad then connects to your iPhone, showing a hotspot icon instead of the usual wave icon for the Wi-Fi menu.

    Could it get any simpler? When you’re done, the safest thing to do, to ensure you don’t accidentally end up using too much of your data allowance, is to turn off the Personal Hotspot switch in Settings > Personal Hotspot. Your Mac or iPad will automatically disconnect.

    Actually, it CAN be simpler! Your Mac can automatically use the personal hotspot on your iPhone to connect to the Internet when they’re within range of each other.

    Use Instant Hotspot on your iPhone (with iOS 8 or later) to provide internet access to your Mac computers and other iOS devices (with OS X Yosemite or iOS 8) that are in range and signed into iCloud using the same Apple ID. Instant Hotspot uses your iPhone — you don’t have to enter a password or even turn on Personal Hotspot.

    Make sure your iOS device and your Mac are signed into iCloud with the same Apple ID.

    On your Mac, click the Wi-Fi status icon in the menu bar, then choose your iPhone or iPad.

    After you connect to the iPhone or iPad Personal Hotspot, you can check the cellular signal strength and the battery status of the iPhone or iPad in the Wi-Fi status menu.

    When you’re not using using the hotspot, your devices automatically disconnect to save battery life.

    One more big advantage of Personal Hot Spots. When you are shopping for that new iPad, perhaps you don’t need the cellular model if you nearly always have your iPhone handy. That’s what I do. If I need internet access on my Wi-Fi iPad, I simply connect to my Hot Spot! Saves me the added cost of a cellular-enabled iPad and the monthly fees from the cell carrier!

  • Do you use iCloud for Safari?

    With all the news surrounding the government’s attempt to force Apple to write software that doesn’t exist to crack an iPhone, iCloud has been in the news, too! Do you use iCloud? Apple has some huge server farms to support this amazing technology and I thought it would be good to do a brief review of some of the features as they relate to Safari.

    iCloud has sort of settled to the back of my mind because it just does its thing in the background and serves up features that I take for granted. But this week, I ran into a dilemma that puzzled me for some time. I noticed that I had accidentally deleted one of my folders in my Safari favorites bar. These were important bookmarks and I needed them back. Well, like a good boy, I have a Time Machine backup and quickly went back in time and restored my Safari bookmarks from a time before I had deleted them. Good stuff, but when I went to look the next morning, the folder was gone again. This happened a few times with me going back in time to get the .plist file. Then I figured it out – I had Safari active in iCloud so my bookmarks were being synced in the cloud. So, every time I restored it, it would eventually be overwritten by iCloud. The solution? Really sort of simple, I turned off Safari in iCloud preferences and turned it back on, problem solved.

    Activating Safari in iCloud gives you some great tools. You can start browsing on your iPad and pick up seamlessly from your Mac or you iPhone. It syncs your bookmarks and tabs and if you also use iCloud Keychain it will remember all those passwords for the websites you visit. If you use the reading list function of Safari it will also keep those current across your devices.

    As with the other features of iCloud, the features only work if you are signed on with the same Apple ID on all of your devices. It won’t know that you are signed onto one AppleID with your Mac and another with your iPhone. Most common issues with iCloud come down to this simple issue. Apple has not made it easy to merge Apple IDs so at least for iCloud you should be consistently using the same Apple ID. Open the iCloud System Preference on your Mac and choose Safari to activate iCloud on your Mac or go to the iCloud Setting on your iPhone or iPad to activate.

    You can also access the Safari tabs that you have open on your Mac on your iPhone or iPad. It is a bit different looking on the iPhone or iPad. Open Safari on your iPhone or iPad and then tap the tabs icon. You will see all of your open Safari windows but if you scroll down at the bottom will be all the tabs open on your Mac and you can click on any of those to make it active.

  • Apple Vision Pro First Thoughts

    I feel a little bit like Geordi from Star Trek when I am wearing my new Vision Pro and sorta wish it was…