What Is Safe Mode, and When Should You Use It?
Although Macs are highly reliable, unusual problems can still rear their ugly heads. Often, these issues are caused by software you’ve installed or accessories you’ve connected. If you’re experiencing Mac misbehavior that isn’t easily fixed by restarting, updating software, or unplugging a dodgy device, try safe mode. (Seriously, before checking if safe mode will help with a problem, you should always restart, ensure you’re running the latest version of macOS and any involved apps, and unplug non-essential peripherals.)
Safe mode is one of macOS’s key troubleshooting tools, though many users don’t know when or how to use it. By starting up your Mac with minimal required software and services, safe mode can help identify and resolve various system issues.
How to Enter Safe Mode
The process for entering Safe Mode varies depending on whether you have a Mac with Apple silicon or an Intel-based Mac.
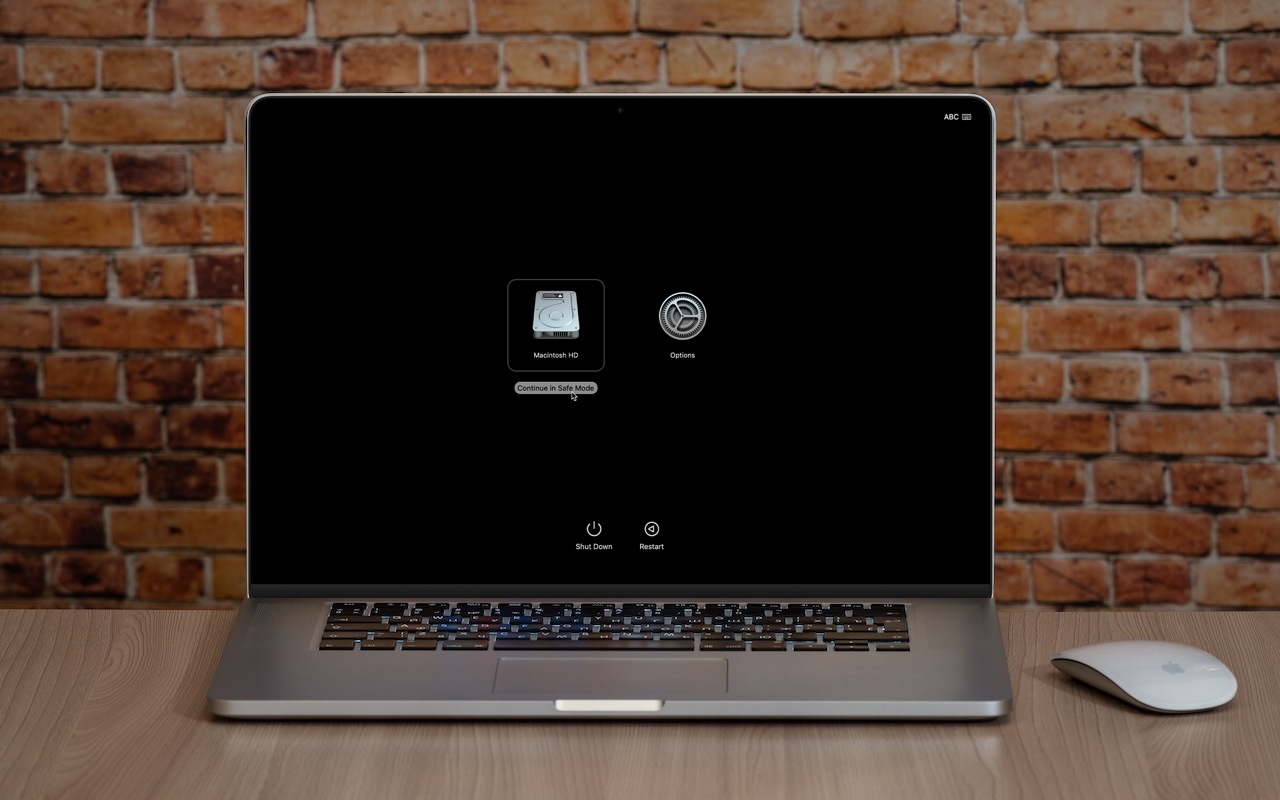
For Macs with Apple silicon:
- Shut down your Mac.
- Press and hold the power button until the startup options appear.

- Select your startup disk.
- Hold the Shift key and click Continue in Safe Mode.
- Log in (you may need to do this twice). You’ll see “Safe Boot” in red in the menu bar on the login screen.

For Intel-based Macs:
- Restart your Mac.
- Press and hold the Shift key until you see the login window.
(If you have a firmware password, you must remove it in Recovery before starting up in safe mode.)
To verify that you’re in safe mode, click the Apple menu while holding the Option key, select System Information, and look for “Boot Mode: Safe” under Software. To exit safe mode, just restart your Mac normally.

What Safe Mode Does
When your Mac boots in safe mode, it performs several important functions designed to eliminate troubleshooting variables:
- Prevents non-essential software from loading, including third-party login items, kernel extensions, system extensions (the modern replacement for kernel extensions), and fonts not installed by macOS
- Clears some system caches, including font caches and the kernel cache
Apple also says that safe mode performs a basic check of your startup disk, but research from the community suggests that this check is no different from the one performed during a normal boot. If you suspect disk-related problems, use the First Aid feature of Disk Utility to conduct a more comprehensive (and much slower) test.
This minimal environment helps identify whether the problems are caused by software that loads during startup or by core system components. Safe mode also prevents many customizations and modifications from taking effect, making it easier to determine if third-party software is the cause of the issues.
However, the downside of using safe mode is that some macOS features may not work. According to Apple, these include “video capture, graphics performance, file sharing, Wi-Fi, accessibility, audio devices, and devices connected via USB, Thunderbolt, or FireWire.” In practice, some of these will work fine, but the main point is that you might not be able to do everything you want while in safe mode. It’s designed for troubleshooting, not regular use.
When to Use Safe Mode
Safe Mode is beneficial in several common scenarios:
- Identifying extension conflicts: If your Mac is misbehaving, booting in safe mode can help determine if third-party kernel or system extensions are the cause.
- Troubleshooting startup problems: If your Mac doesn’t start normally, safe mode might help you get in and address the issue.
- Installing updates: Although this is less necessary in recent versions of macOS, if a macOS update fails to install properly, trying again in safe mode often resolves the issue.
- Fixing update issues: Problems that appear after a macOS update—likely caused by outdated third-party software incompatible with the new version of macOS—can often be resolved by starting in safe mode.
- Performance problems: If your Mac is running slowly, safe mode can help identify whether login items or extensions are causing the issue.
- General diagnostics: Safe mode is a worthwhile initial step for diagnosing issues before attempting more complex solutions.
What Comes After Safe Mode
Once you’re in safe mode, it’s up to you to reproduce the problem you experienced earlier. Then, there are two possibilities:
- The problem persists in safe mode: While this result is not ideal, safe mode has still provided you with more troubleshooting information by eliminating third-party login items, extensions, and fonts from consideration, along with clearing certain caches. Since those aren’t the cause, try testing in a clean user account, disconnecting remaining peripherals, and reinstalling macOS.
- The problem goes away in safe mode: Great! First, restart your Mac to see if the problem has disappeared, as would be the case if it were related to corrupt caches. If the problem returns after restarting, you can narrow down the cause to third-party login items, extensions, or fonts. Remove third-party log-in items in System Settings > General > Login Items & Extensions. (We recommend taking a screenshot with Command-Shift-5 first, so you can remember how you were set up.) You can also disable extensions in System Settings > General > Login Items & Extensions by toggling their switches. Restart and test again. If that still doesn’t fix it, try testing in a clean user account to rule out any software issues tied to your main account.
The beauty of safe mode is that it’s easy to enter and entirely non-destructive. It may not help identify all possible problems, but it’s always worth trying after the simple steps of restarting your Mac, updating associated software, and unplugging non-essential peripherals.
(Featured image based on an original by iStock.com/Armastas)
Social Media: Having Mac problems? Before trying more complex solutions, restart in safe mode—your Mac’s stripped-down troubleshooting environment. It disables non-essential software and clears system caches to help identify and resolve common issues.